SWFP
Simplify Data Submission to Google Sheets with Super Wizard Form Pack!
- Getting Started
- Back to home
- Welcome
- Features
- Change Log
- Authentication
- Change Credentials
- Form Integration
- Make a Spreadsheet
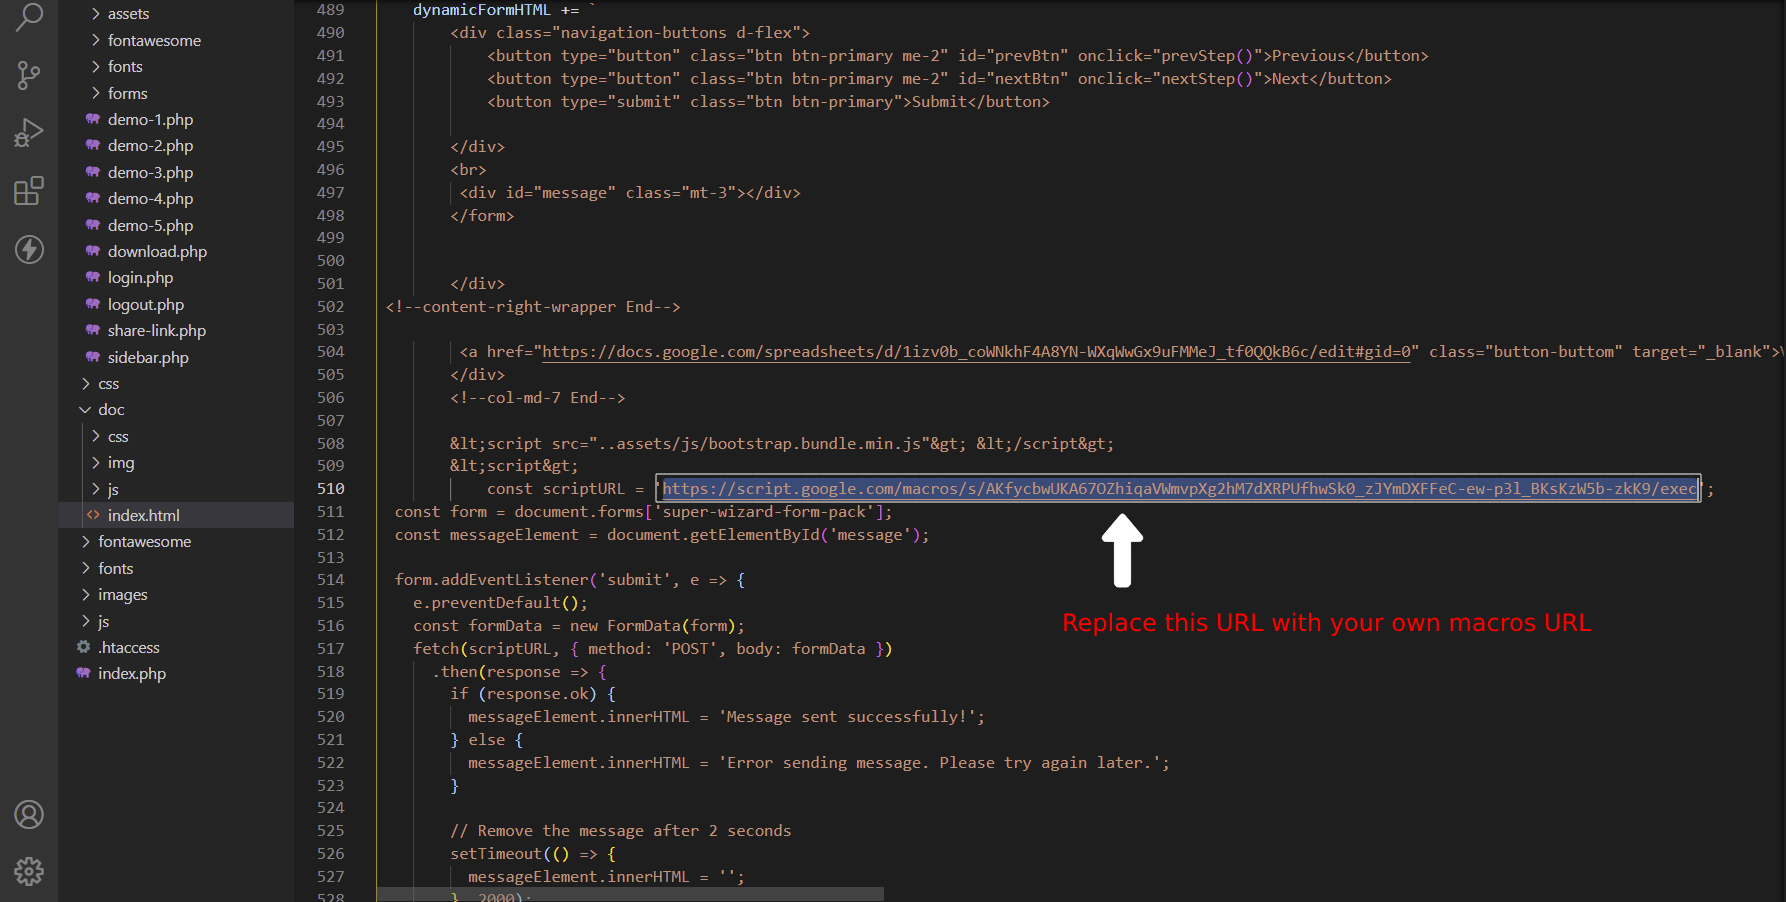
- URL with App Script
Getting Started
Welcome
Thanks for purchasing our Super Wizard Form Pack :)
It is our great pleasure that you purchased our tools.
If you have any questions, feel free to contact us at support@designcollection.in.
Features
- Form Creation
- Add Form Titles and Subtitles
- Multiple Design Options
- Customization the Form
- Social Media Sharing
- Data Submission to Google Sheets
- App Script URL Generation
Change Log
- :: VERSION 3.0 WAS RELEASED ::
- Updated Google App Script
- Added Simple Amdin Dashboard
- Added More Person Information Field
- :: VERSION 2.0 WAS RELEASED ::
- Enhanced Form Titles and Subtitles
- Customize the Form
- Generate URL with App Script
- Submit Custom HTML form data to Google Sheets
- Efficient Data Management
- Bug Fixes and Performance Enhancements
- :: VERSION 1.0 WAS RELEASED ::
- Initial Release
Authentication
Change Credentials

To change the credentials, open the login.php web page and change your username and password.
Make a spreadsheet
Step 1: For of all open your gmail account and Make a spreadsheet.
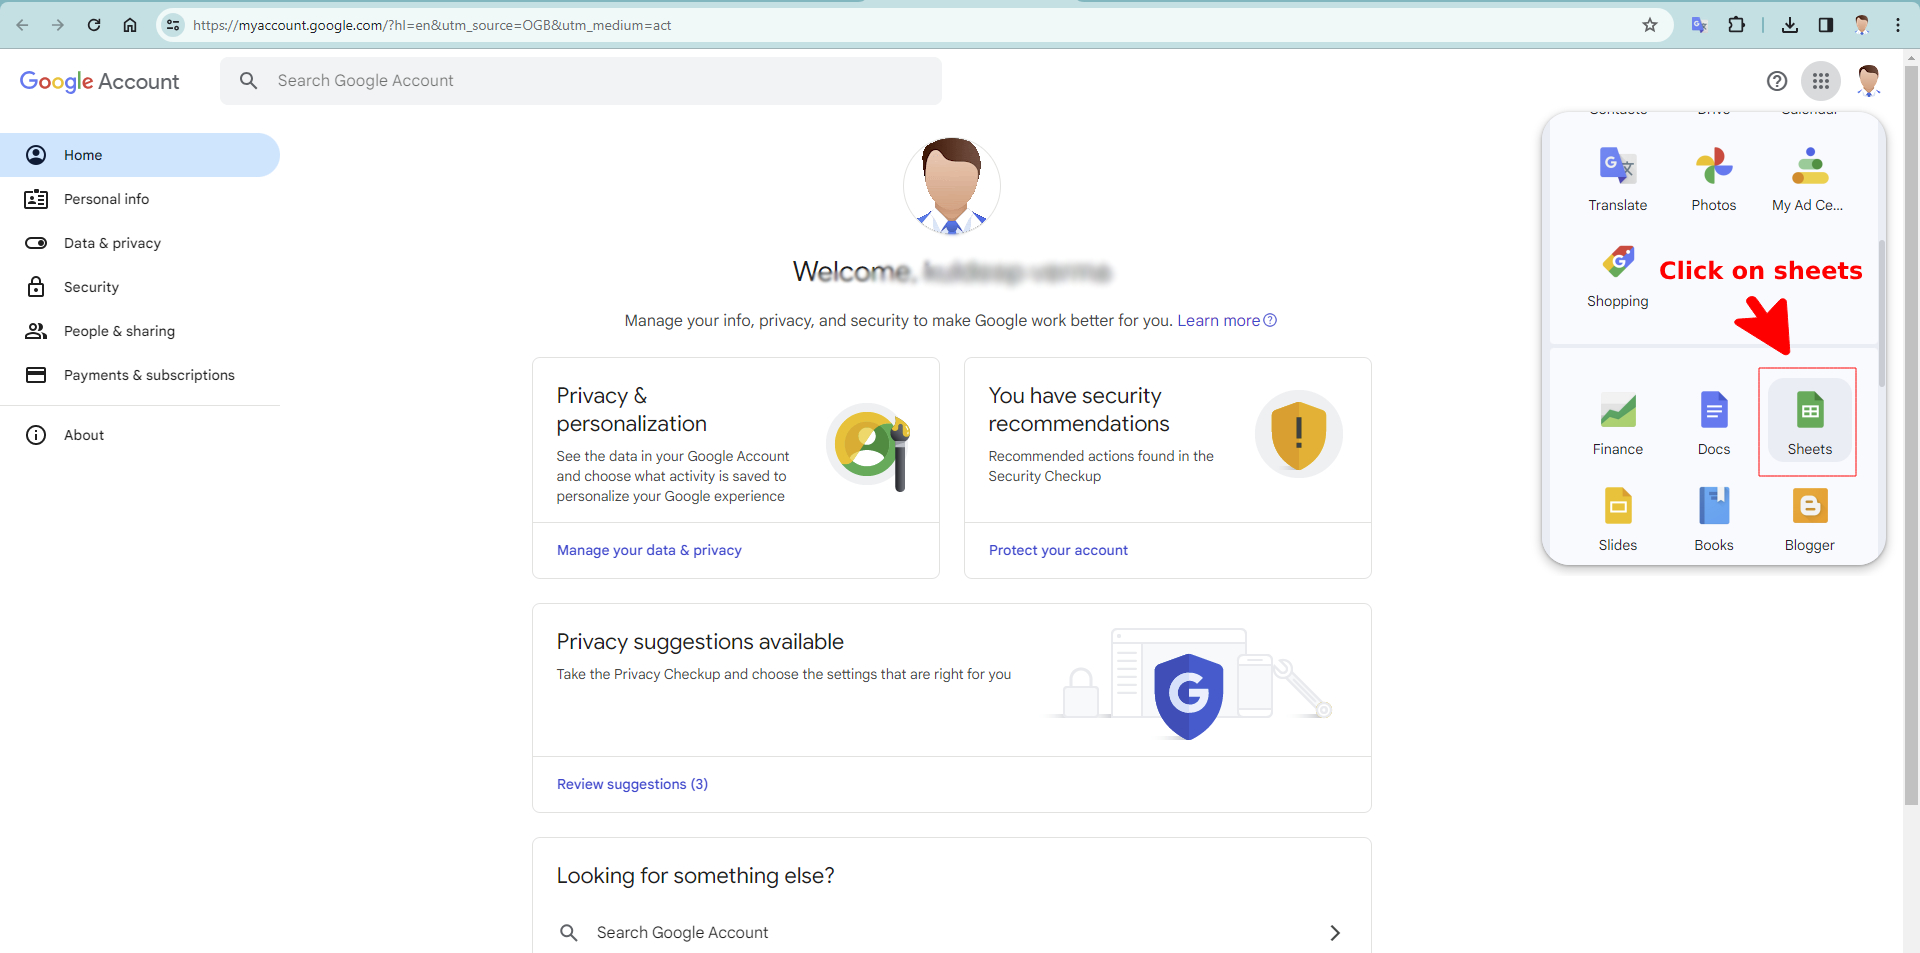
Start a new spreadsheet
Form Integration
Step 2: Generate URL with App Script
Moving on, we now need to generate a Google Sheets app URL that will give us the ability to automatically send data to Google Sheets when we submit our PHP form.
We'll all get along don't worry!
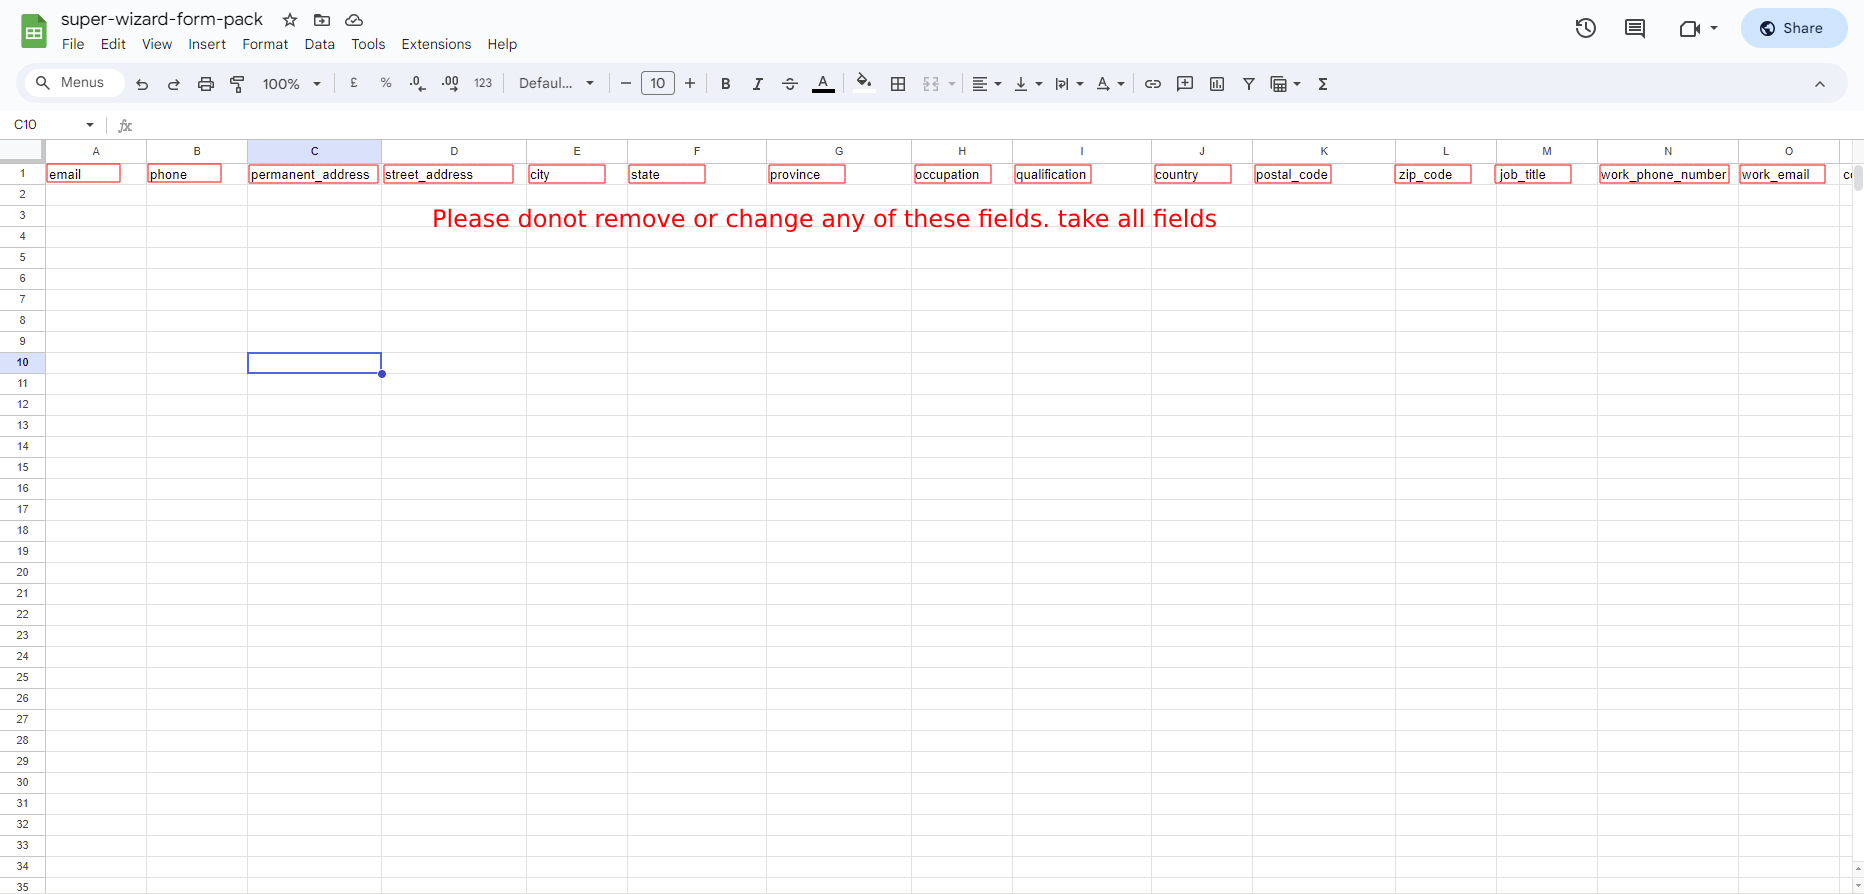
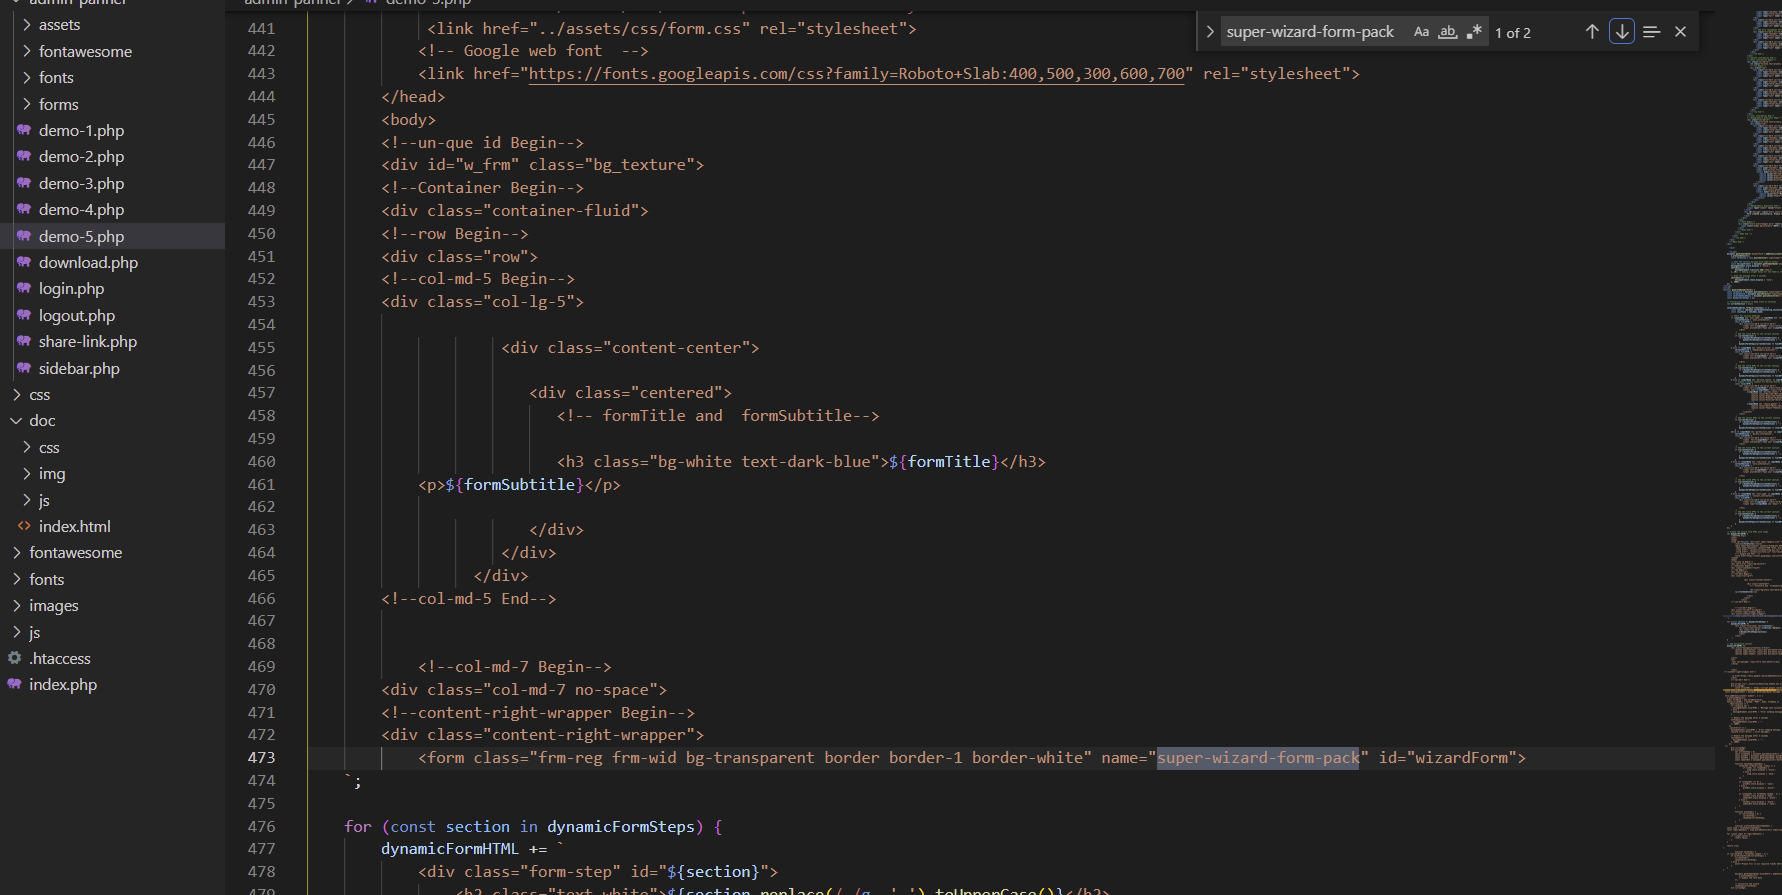
1. We name our Google Spreadsheet “super-wizard-form-pack”. You can give a different name. whatever you'd like. I have named it “super-wizard-form-pack”. Just remember that we will need this name later.
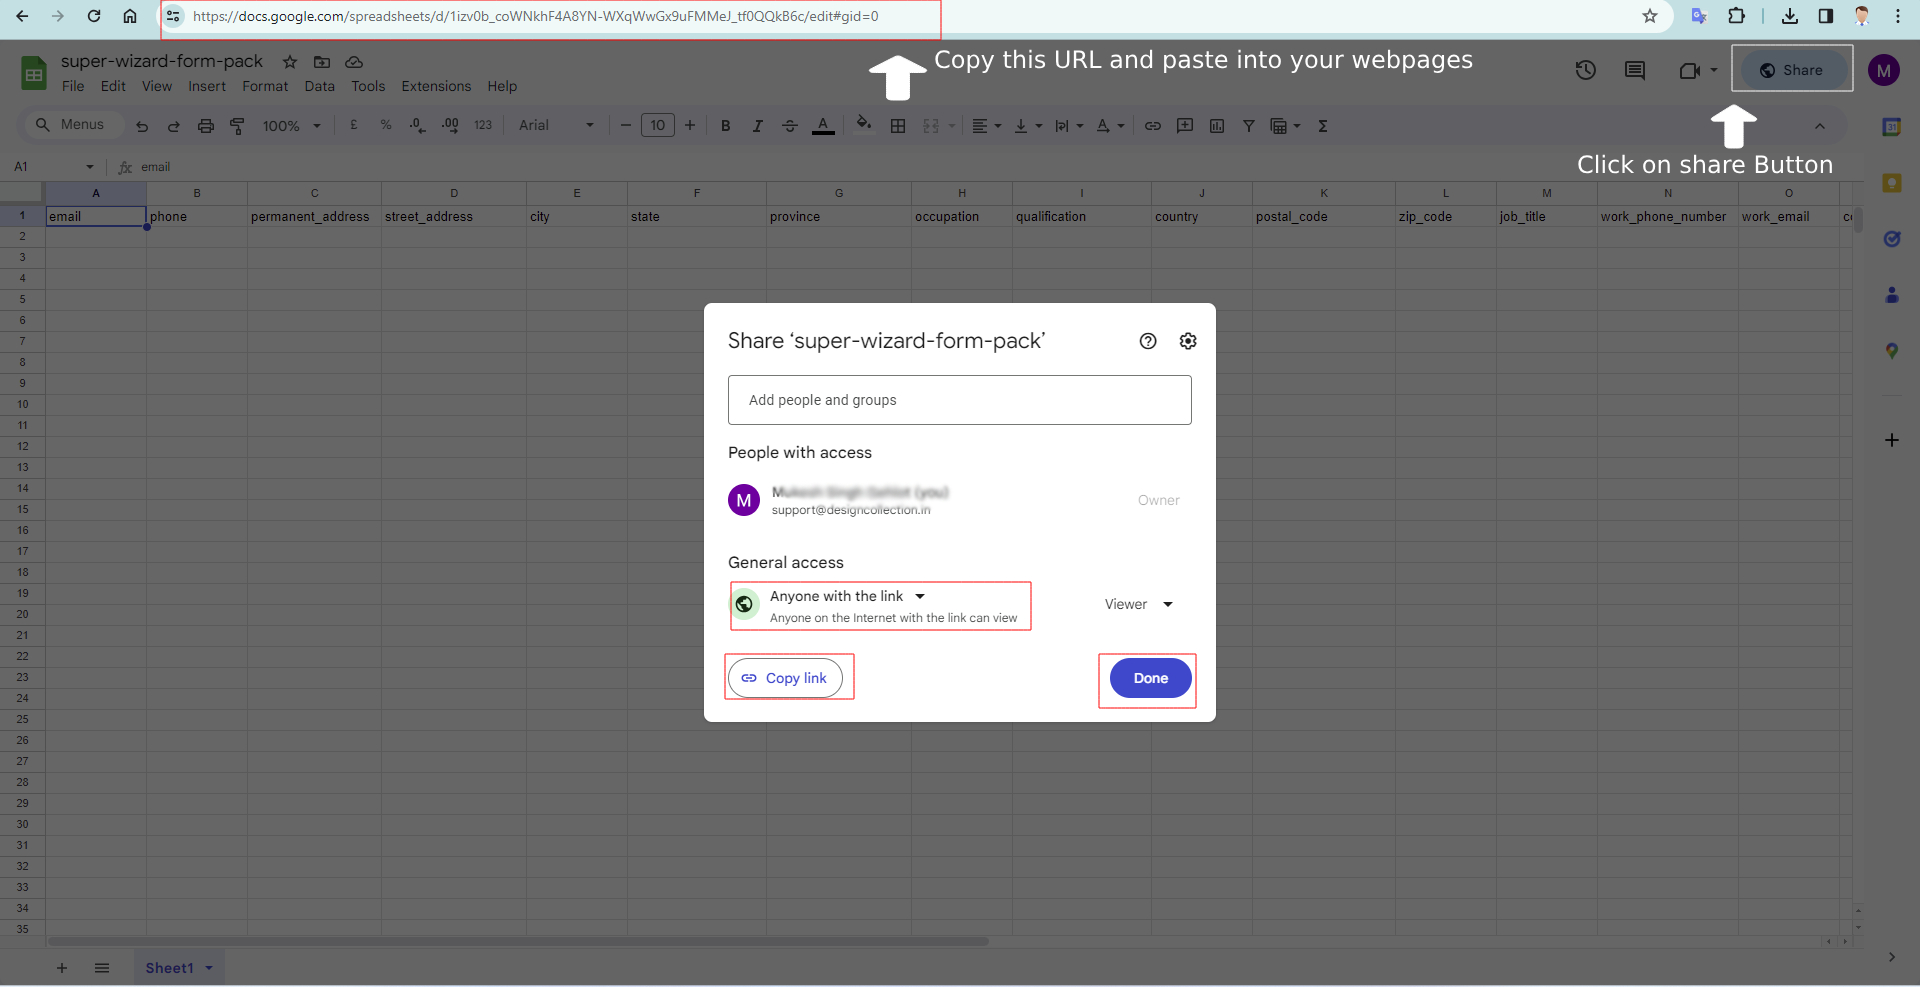
2. We give our Google Sheets column the same name as our name attribute in the PHP form. Remember our first input field is named "email" and second one is named "phone" and third one is named "permanent_address" and there are many more..
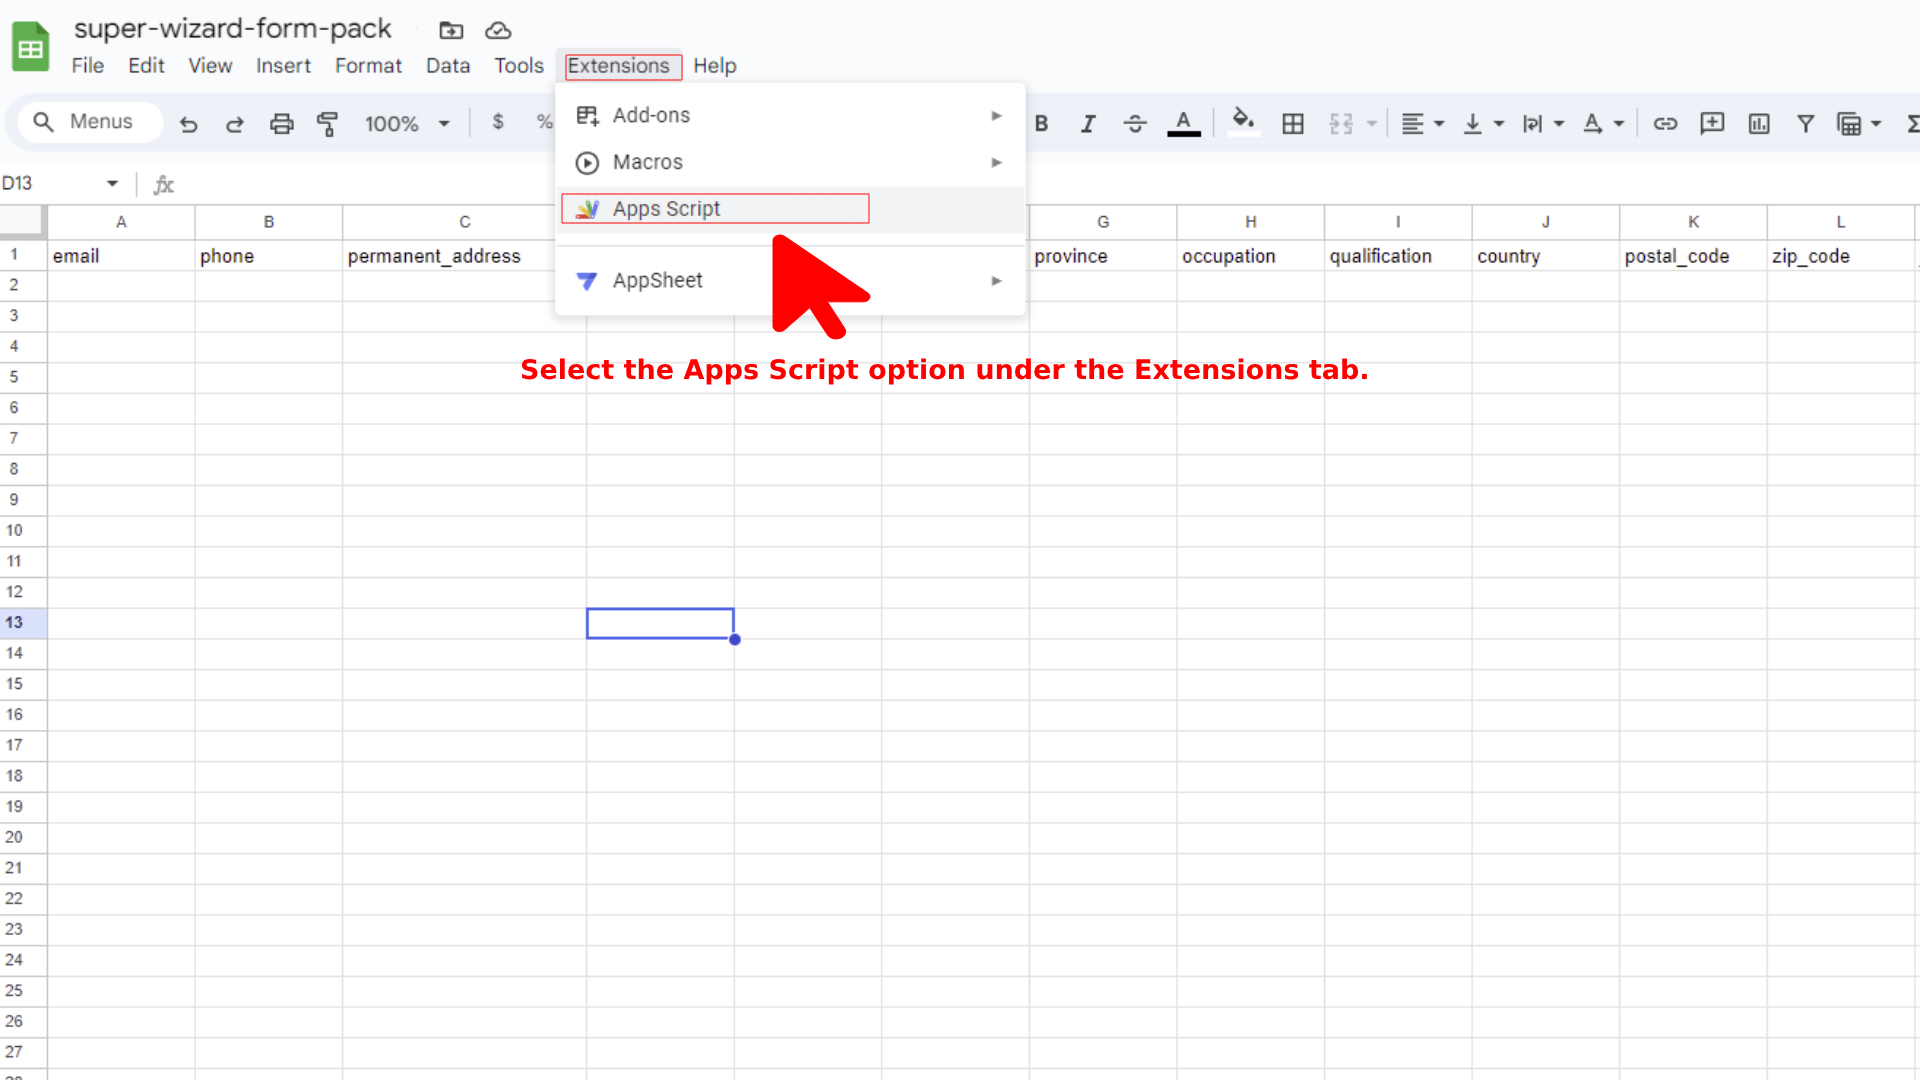
3. Go to the Extension Tab in Google Sheets once the field names have been properly configured. Select the Apps Script function by clicking on it. You will be taken to a different page as a result..
4. In this Apps Script page, you will see a sample code of the JavaScript function.
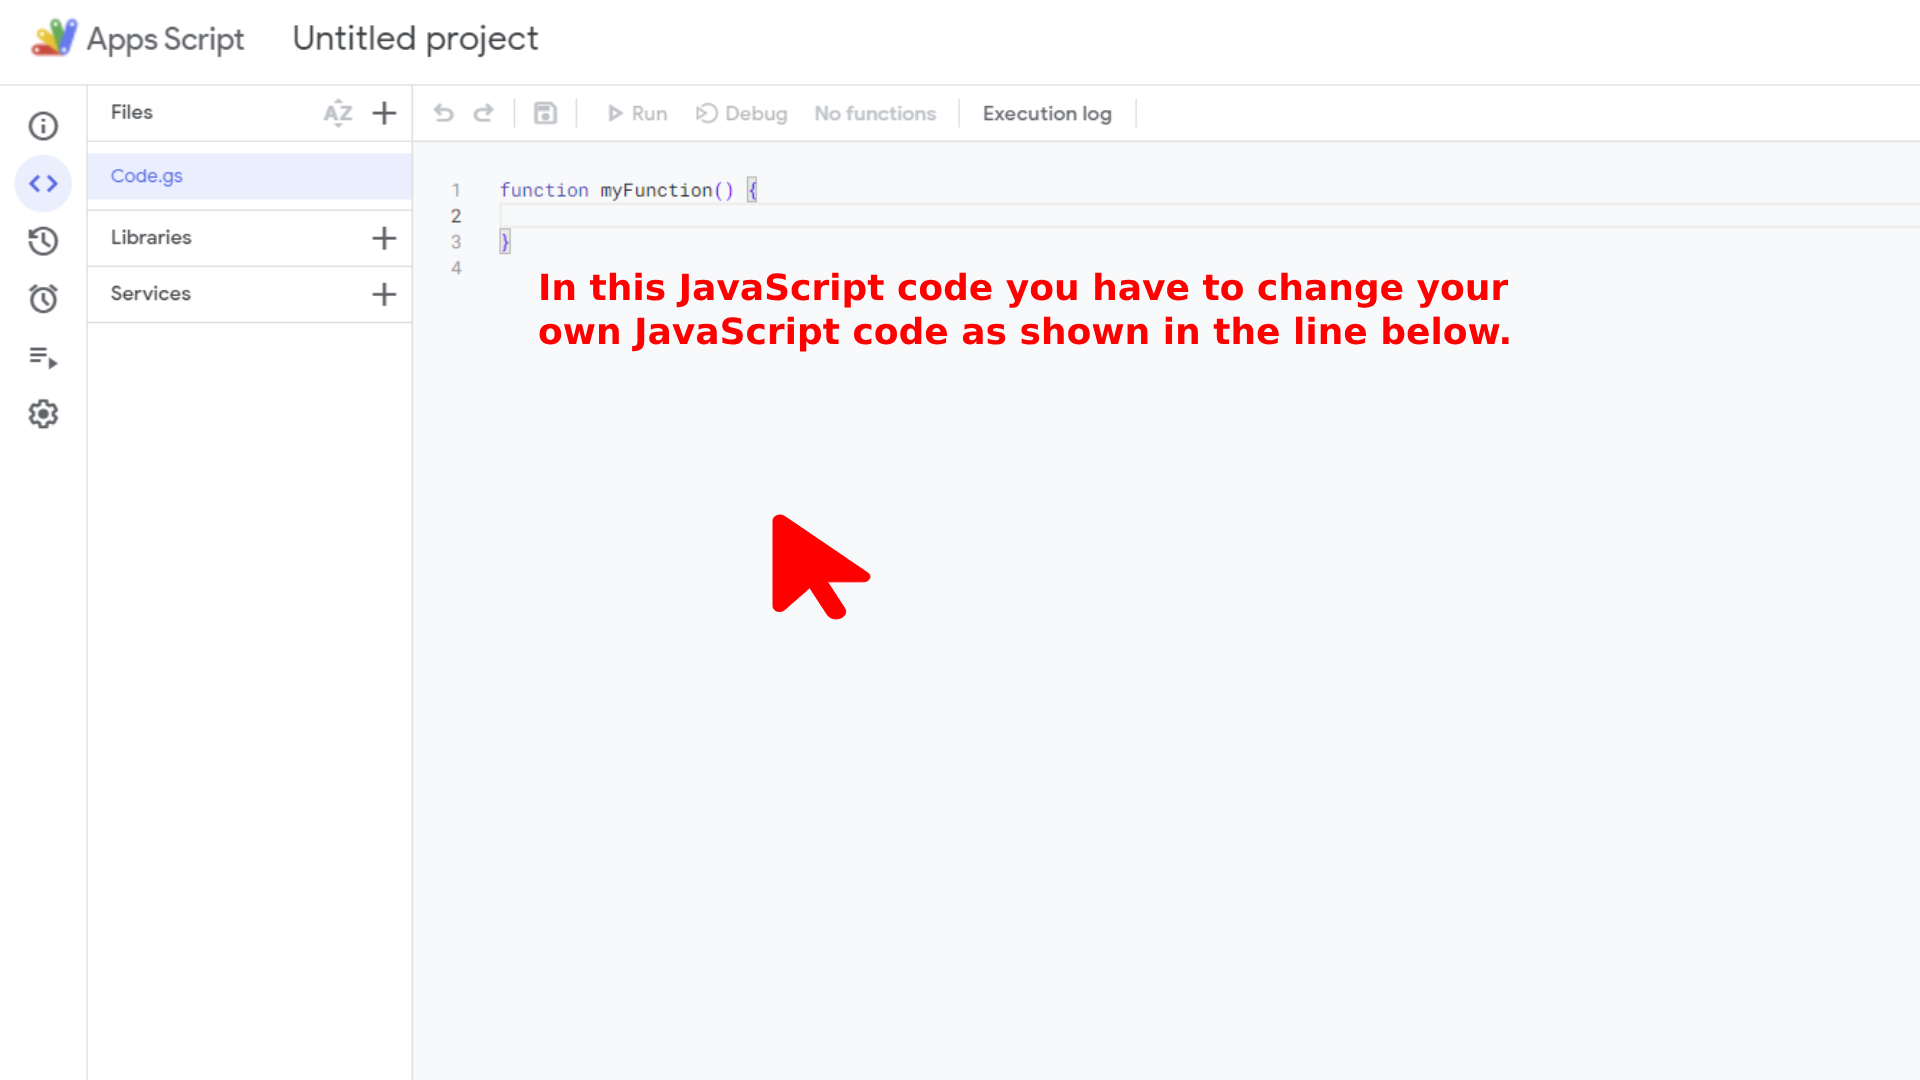
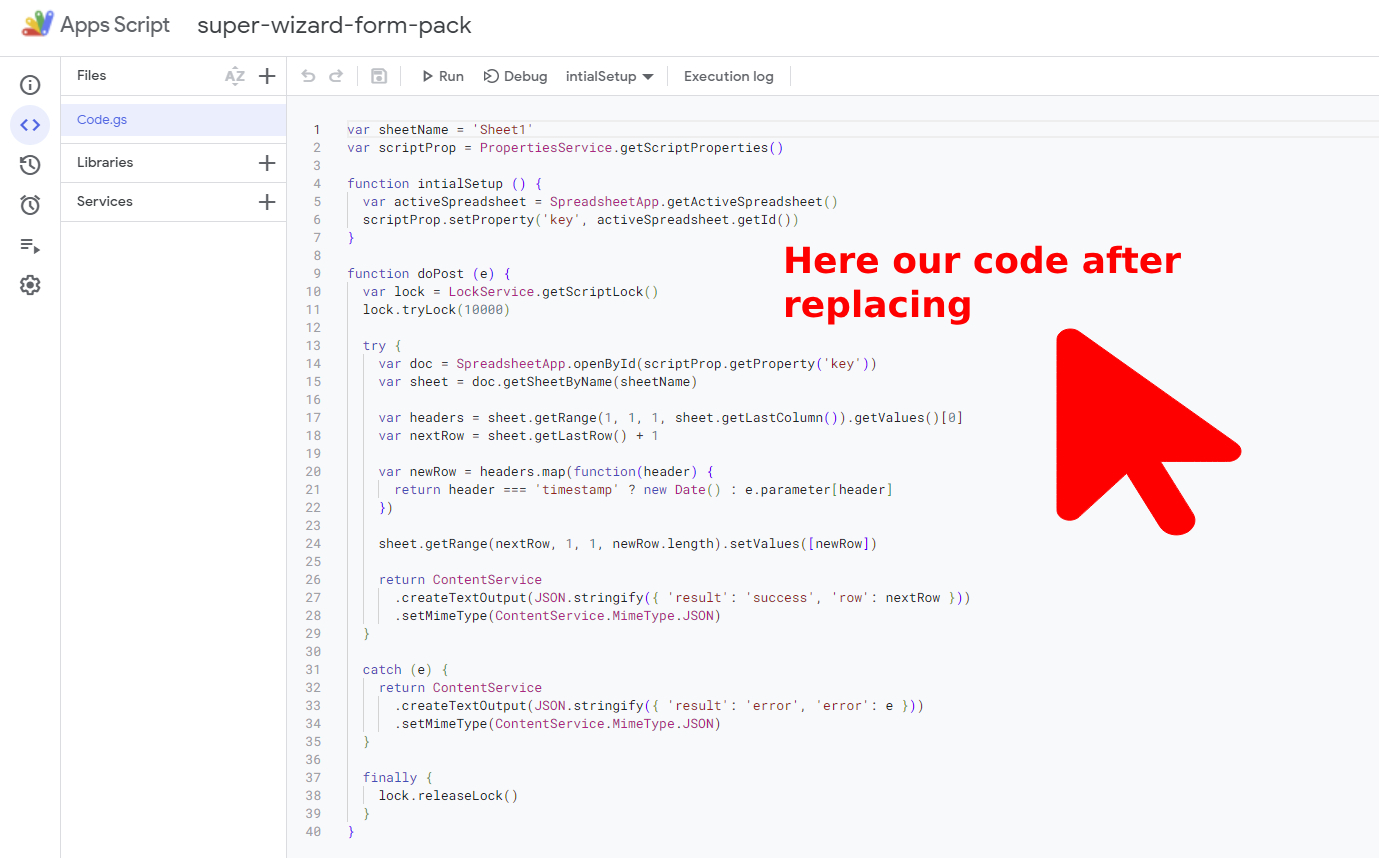
5. We can now just copy and paste our JavaScript code. This is how the code looks:
                            var sheetName = 'Sheet1'
                            var scriptProp = PropertiesService.getScriptProperties()

                            function intialSetup () {
                            var activeSpreadsheet = SpreadsheetApp.getActiveSpreadsheet()
                            scriptProp.setProperty('key', activeSpreadsheet.getId())
                            }

                            function doPost (e) {
                            var lock = LockService.getScriptLock()
                            lock.tryLock(10000)

                            try {
                                var doc = SpreadsheetApp.openById(scriptProp.getProperty('key'))
                                var sheet = doc.getSheetByName(sheetName)

                                var headers = sheet.getRange(1, 1, 1, sheet.getLastColumn()).getValues()[0]
                                var nextRow = sheet.getLastRow() + 1

                                var newRow = headers.map(function(header) {
                                return header === 'timestamp' ? new Date() : e.parameter[header]
                                })

                                sheet.getRange(nextRow, 1, 1, newRow.length).setValues([newRow])

                                return ContentService
                                .createTextOutput(JSON.stringify({ 'result': 'success', 'row': nextRow }))
                                .setMimeType(ContentService.MimeType.JSON)
                            }

                            catch (e) {
                                return ContentService
                                .createTextOutput(JSON.stringify({ 'result': 'error', 'error': e }))
                                .setMimeType(ContentService.MimeType.JSON)
                            }

                            finally {
                                lock.releaseLock()
                            }
                            }
Here our code after replacing
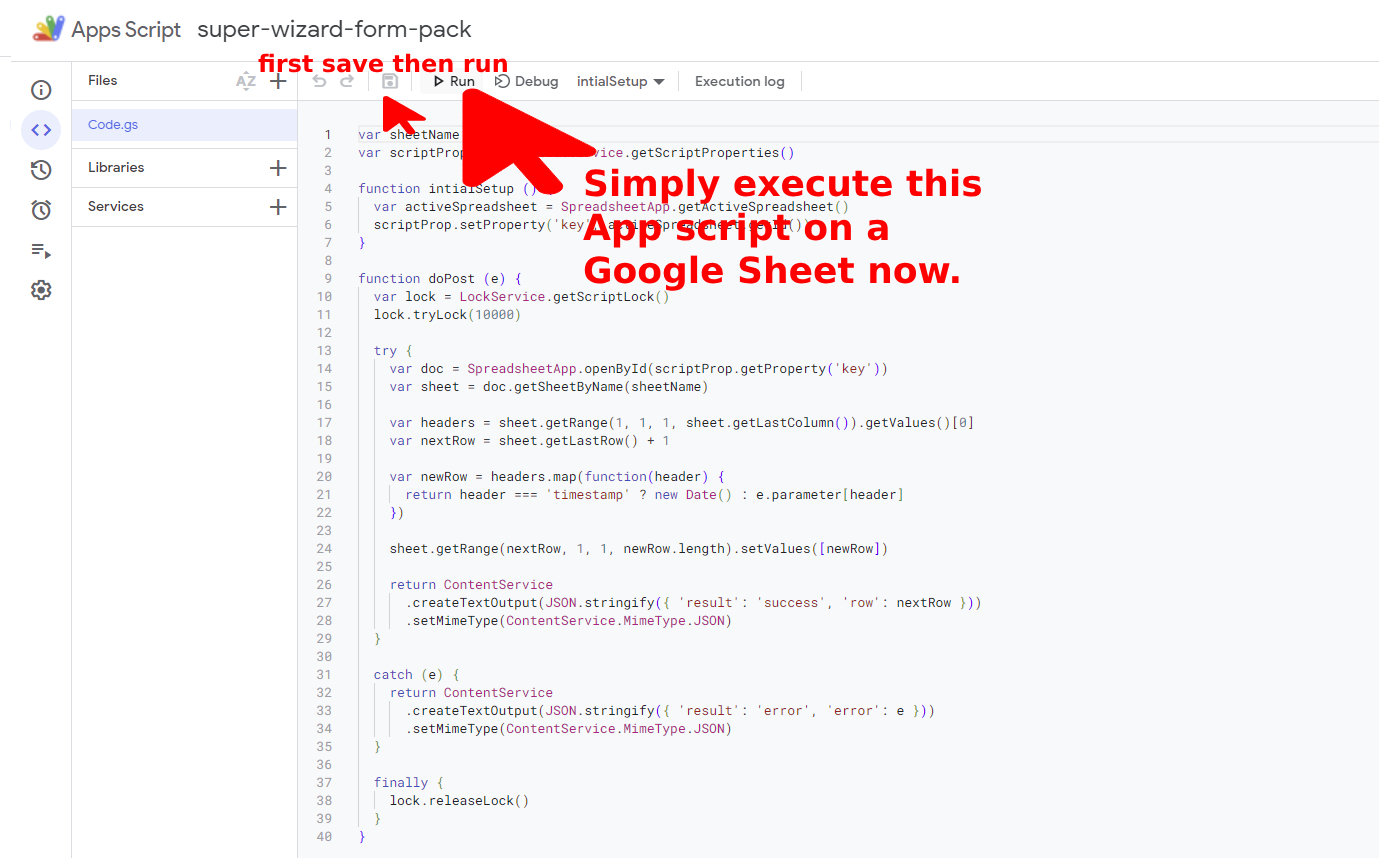
6. Next, we just run our Apps Script.
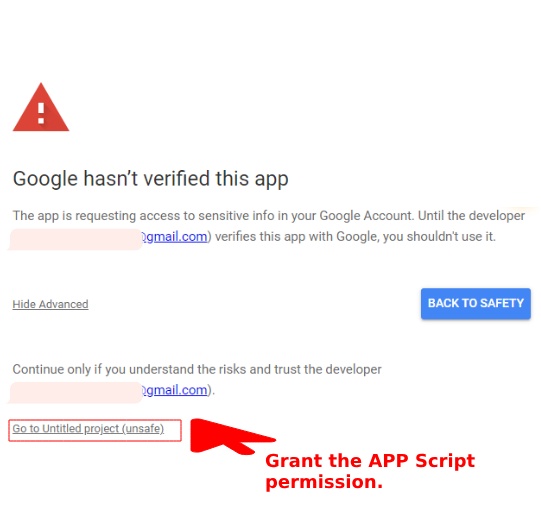
7. After running the script, Google will ask you to allow the script to run.
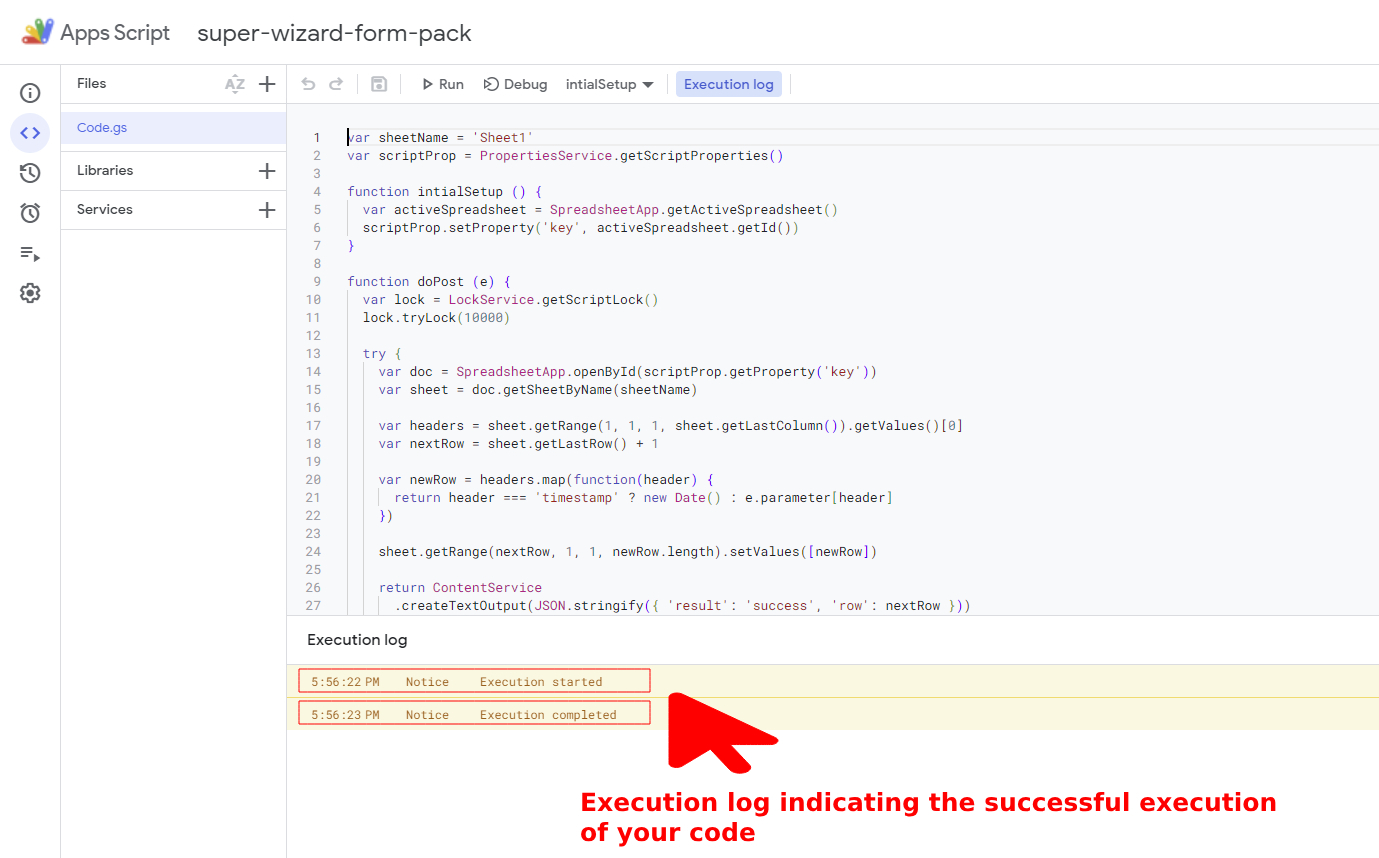
8. Execution log indicating the successful execution of your code
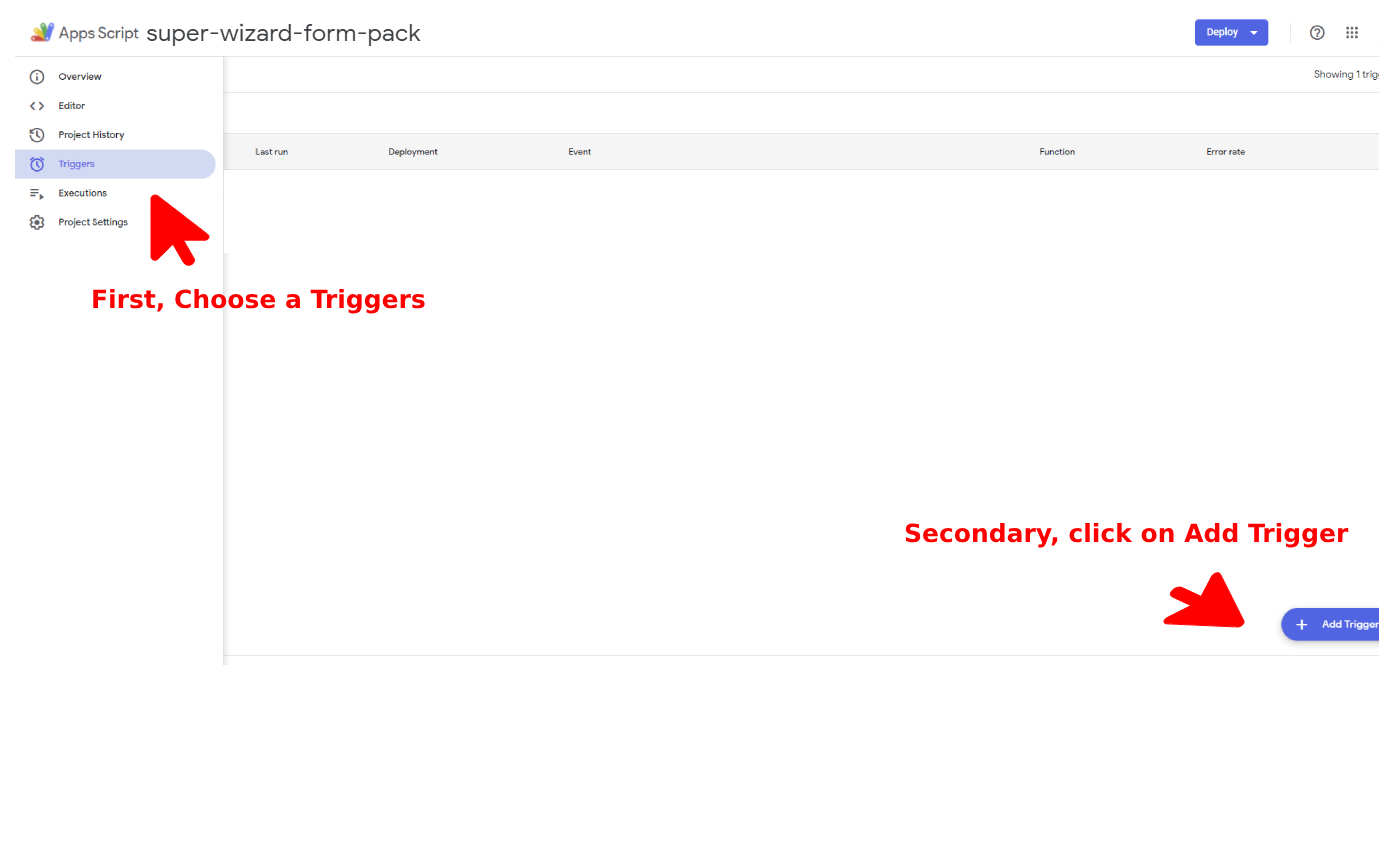
9. The next step in the PHP form submit for our Google Apps script is to Add a trigger and select the appropriate option for it. which are listed below:
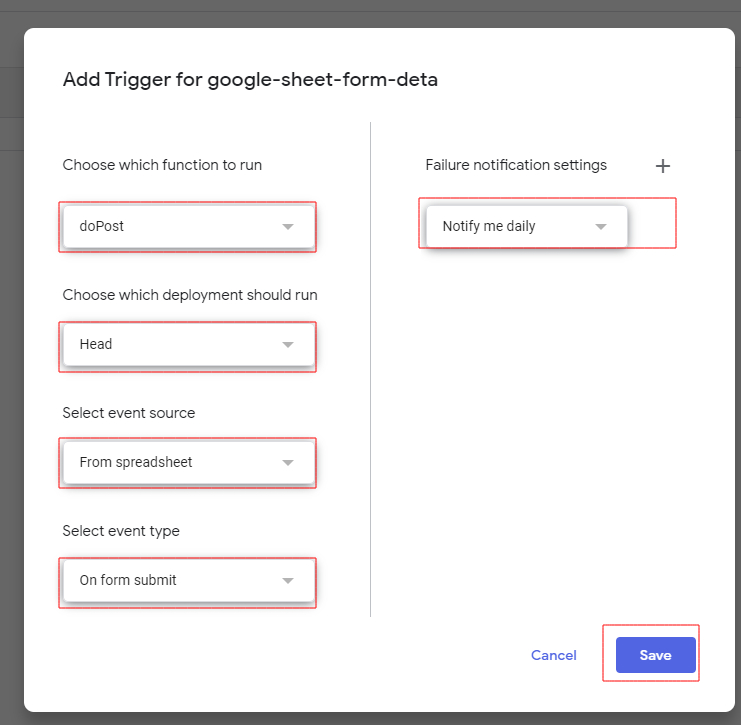
10. Add Trigger for google-sheet-form-deta
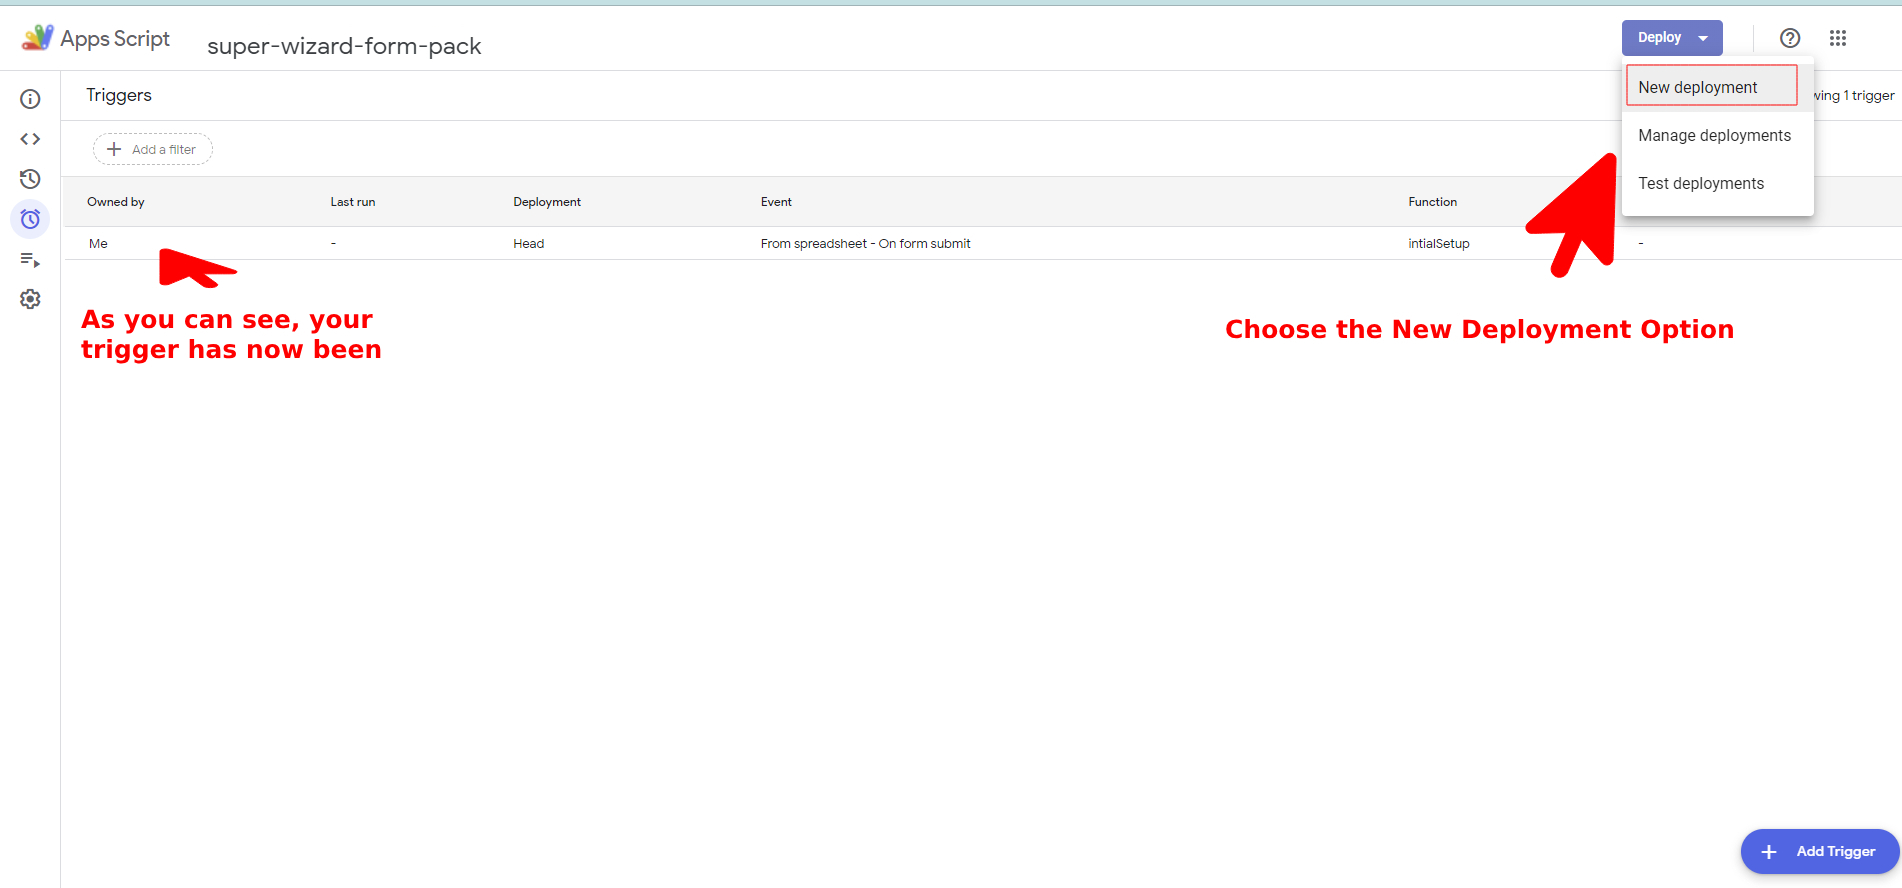
11. Now that Apps Script has a trigger attached to it. Here, we select the newly available deployment option by clicking the Deploy button.
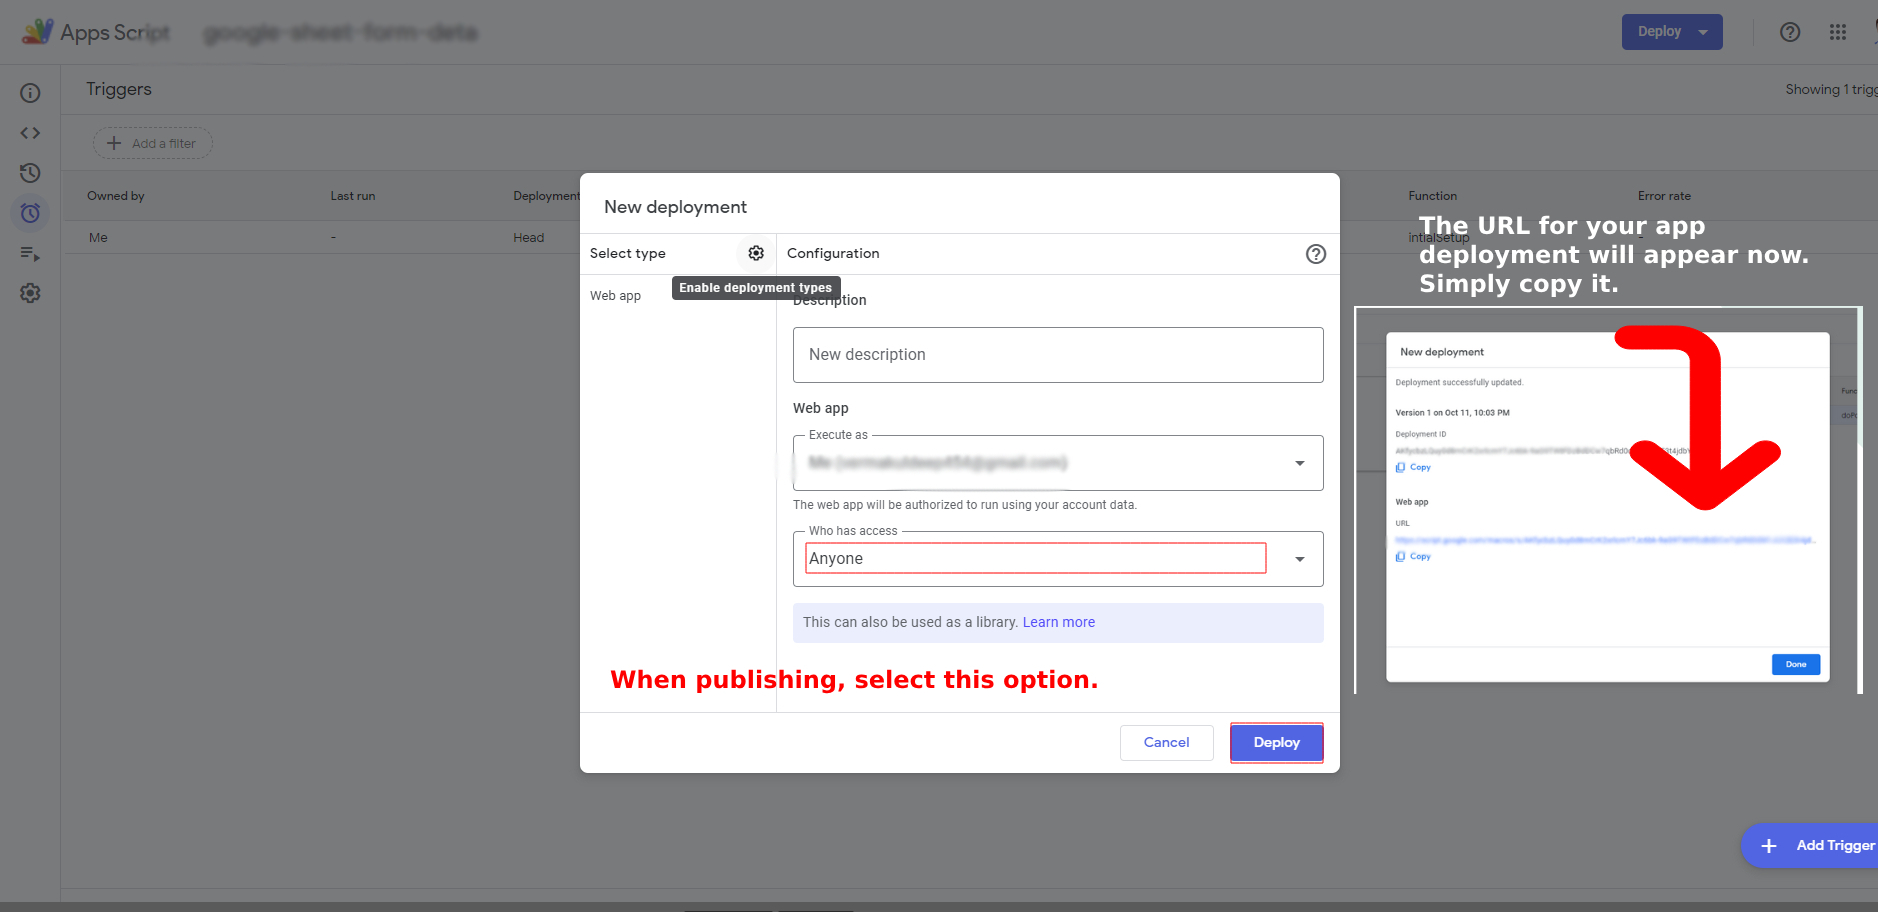
12. We must grant access to all when we publish the Apps Script. Select "Anyone" under the "who has access" option. However, you may be asked to grant access. Finally, your deployment URL will appear.
13. Now you have to share the link.
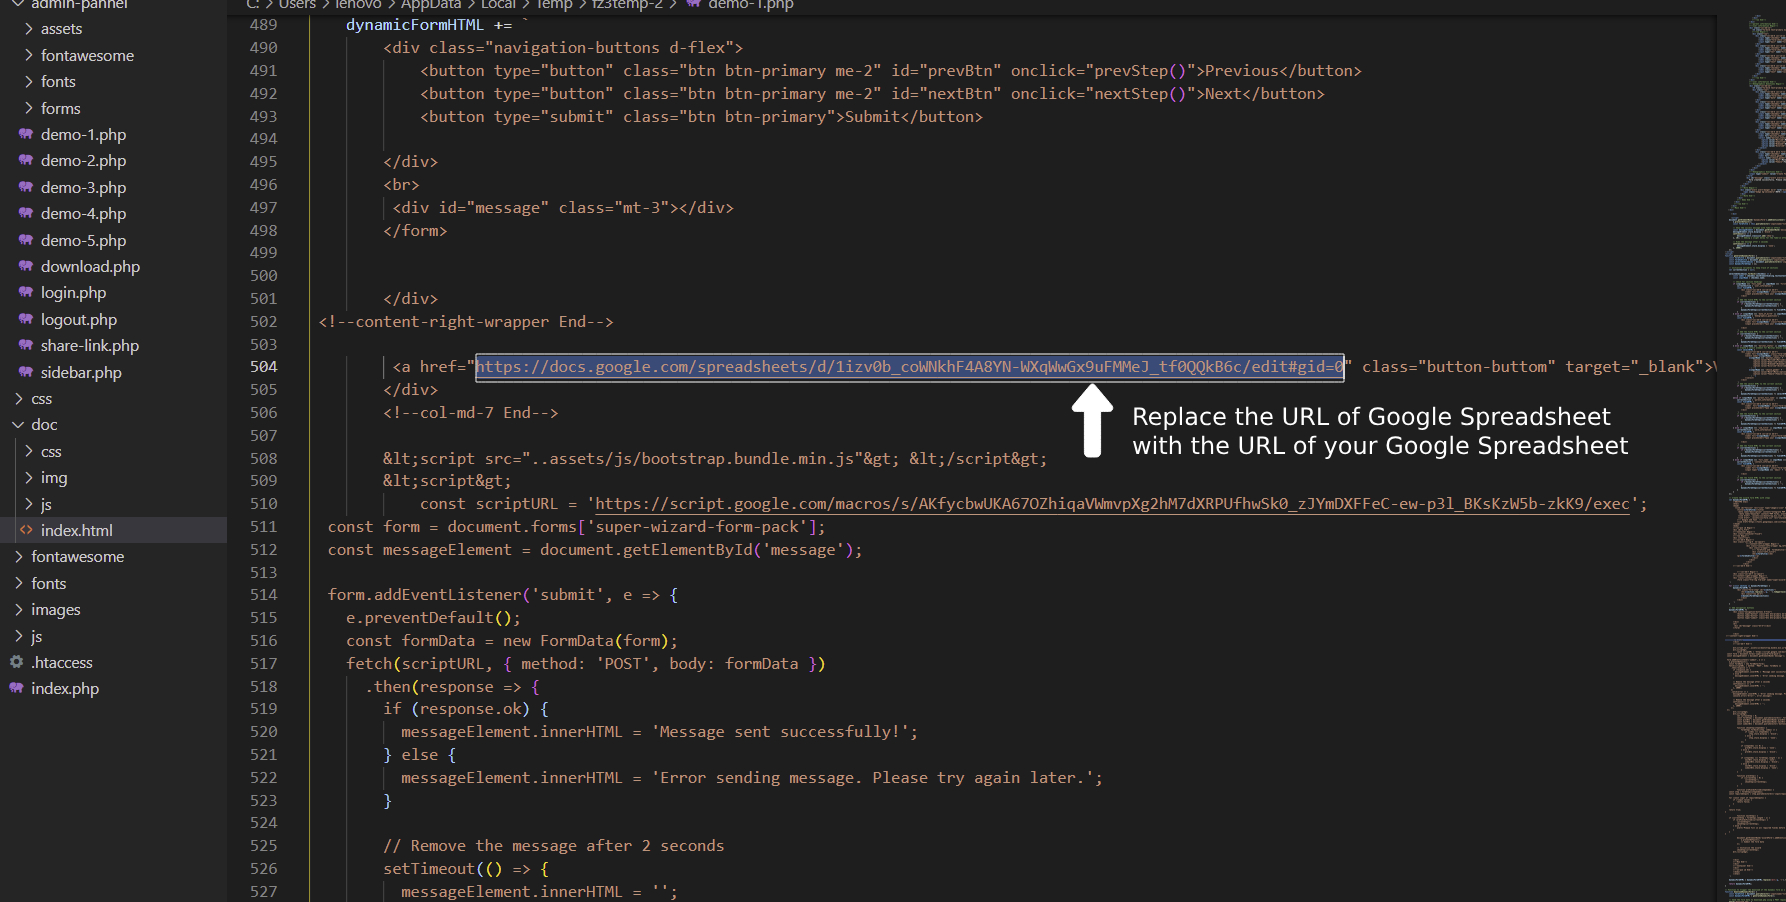
14. You have to paste the URL of Google Spreadsheet in demo-1.php, demo-2.php, demo-3.php, demo-4.php, demo-5.php.
Congratulations! Your Setup hasbeen Completed
Support
If you have any questions, feel free to contact us at support@designcollection.in.