Messenger Chat Widget
Messenger Chat Widget: Simplify User Data Collection
- GO TO HOME
- Getting Started
- Welcome
- Features
- Change Log
- Support
- Source & Credits
- Requirements
- Requirements
- Installation
- Installation
- Authentication
- Change Credentials
- Google Sheet Form Integration
- Make a Spreadsheet
- URL with App Script
Getting Started
Welcome
Thanks for purchasing our Messenger Chat Widget :)
It is our great pleasure that you purchased our tools.
If you have any questions, feel free to contact us at support@designcollection.in.
Features
- Custom Form Create
- Add Form Titles and Subtitles
- Edit Operating Hours
- Choose Custom Color
- Data Submission to Google Sheets
- Data Submission to My SQL
- App Script URL Generation
Change Log
-
:: VERSION 3.0 WAS RELEASED ::
- Enhanced Form Titles and Subtitles
- Customize the Form
- Generate URL with App Script
- Submit form data to Google Sheets
- Choose Custom Color
- Efficient Data Management
- Bug Fixes and Performance Enhancements
-
:: VERSION 2.0 WAS RELEASED ::
- Added Chat Plugin
- Fixed responsive issue
-
:: VERSION 1.0 WAS RELEASED ::
- Initial Version
Supports
Need Support?
We will be happy to talk to you, do not hesitate to mail us if there is any problem with our products or you just want to chat. You may reach us at support@designcollection.in
Support requests are being processed on business days Monday to Friday 10:30 to 18:00 (GMT +5:30) up to 2 business days.
Item support Policy:
- Team-viewer, AnyDesk, Skype, Phone Calls, Signal, and Whatsapp supports are not available.
- Support Via E-Mails and Support requests are being processed on business days Monday to Friday 10:30 to 18:00 (GMT +5:30) for up to 2 business days.
- Support Subscription Must be active to available support.
- Installation and Updation services are Not Free
- after taking customization either self or from other developers then we will not able to provide support.
- Offline Installation and Updation services are Not possible for us.
Source & Credits
1. We are thankful to Favicon for providing the widest range of favicon icons and with that favicon icons we could create this favicon icons.
2. We are grateful to Google Web Font for providing the widest range of font-family and with this font-family we have been able to add this Nunito, sans-serif font-family.
3. We are thankful to Font Awesome for providing the most complete collection of free font icons, through which we have been able to include these Font Awesome icons.
4. We are grateful to freepik, storyset, pngtree for providing the broadest range of royalty-free images and with those images we were able to add this.
Sources:
- https://favicon.io/favicon-generator(Used for generating a favicon icon)
- https://fonts.google.com(Used for Google Web Fonts)
- https://fontawesome.com/v5/search( We're used icons in v5.15.4, an free version of Font Awesome)
- https://www.freepik.com(Used for royalty-free images)
- https://pngtree.com(Used for royalty-free images)
Requirements
Database Server Requirement
- Server: Localhost via UNIX socket
- Server type: MySQL
- Server version: 5.7.44
WEB server Requirement
- PHP version: 8.1
Installation
FTP Upload
- Download the zip file from ThemeForest and unzip it
- Access your server via FTP or SFTP
Upload files to a website in my Linux Hosting account
You can use the built-in File Manager on the Go Daddy account website to browse and upload files to the hosting server. Once you've uploaded your website to the server, your pages and files are available for the public to view and access.
How to Create MySQL Database in GoDaddy cPanel ?
Folder Setup
When you purchase this product, it is very important to place this folder (messenger-chat-widget) and saveFormData.php file in the root directory of your domain.

Authentication
Change Credentials
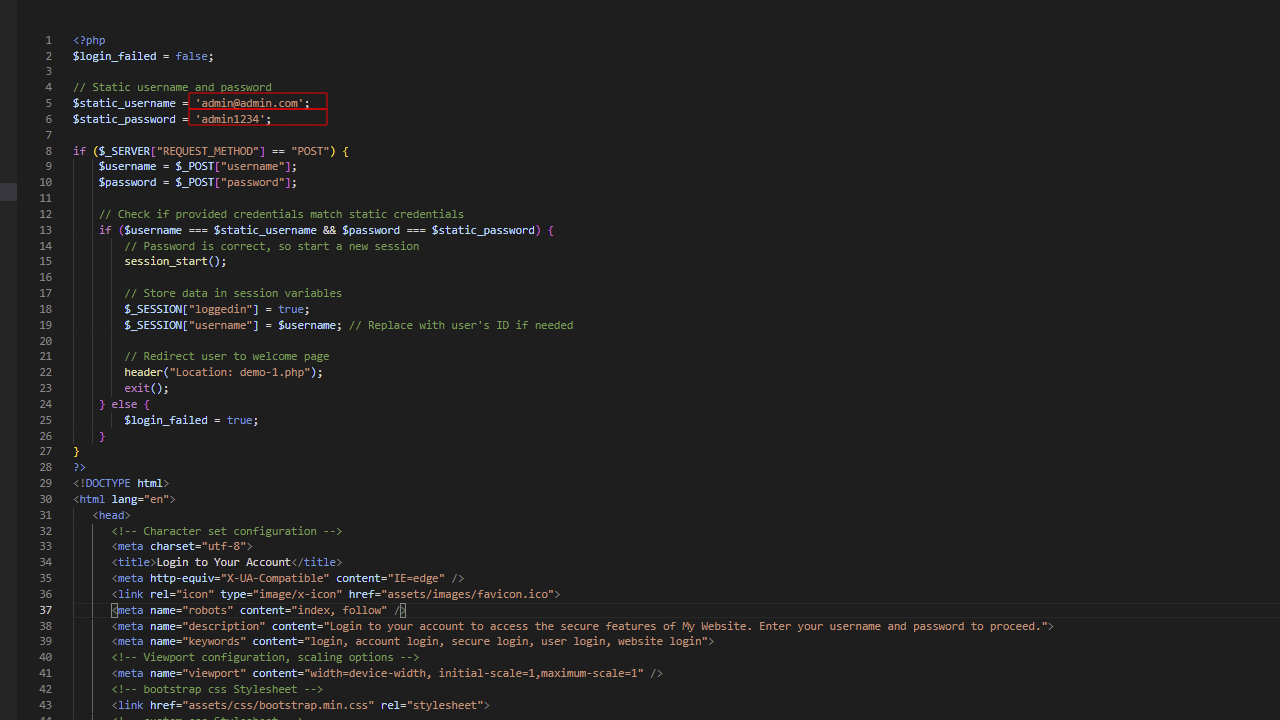
To change the credentials, open the admin-panel folder inside the messenger-chat-widgets folder and find the login.php web page and change your username and password.
Make a spreadsheet
Step 1: For of all open your gmail account and Make a spreadsheet.
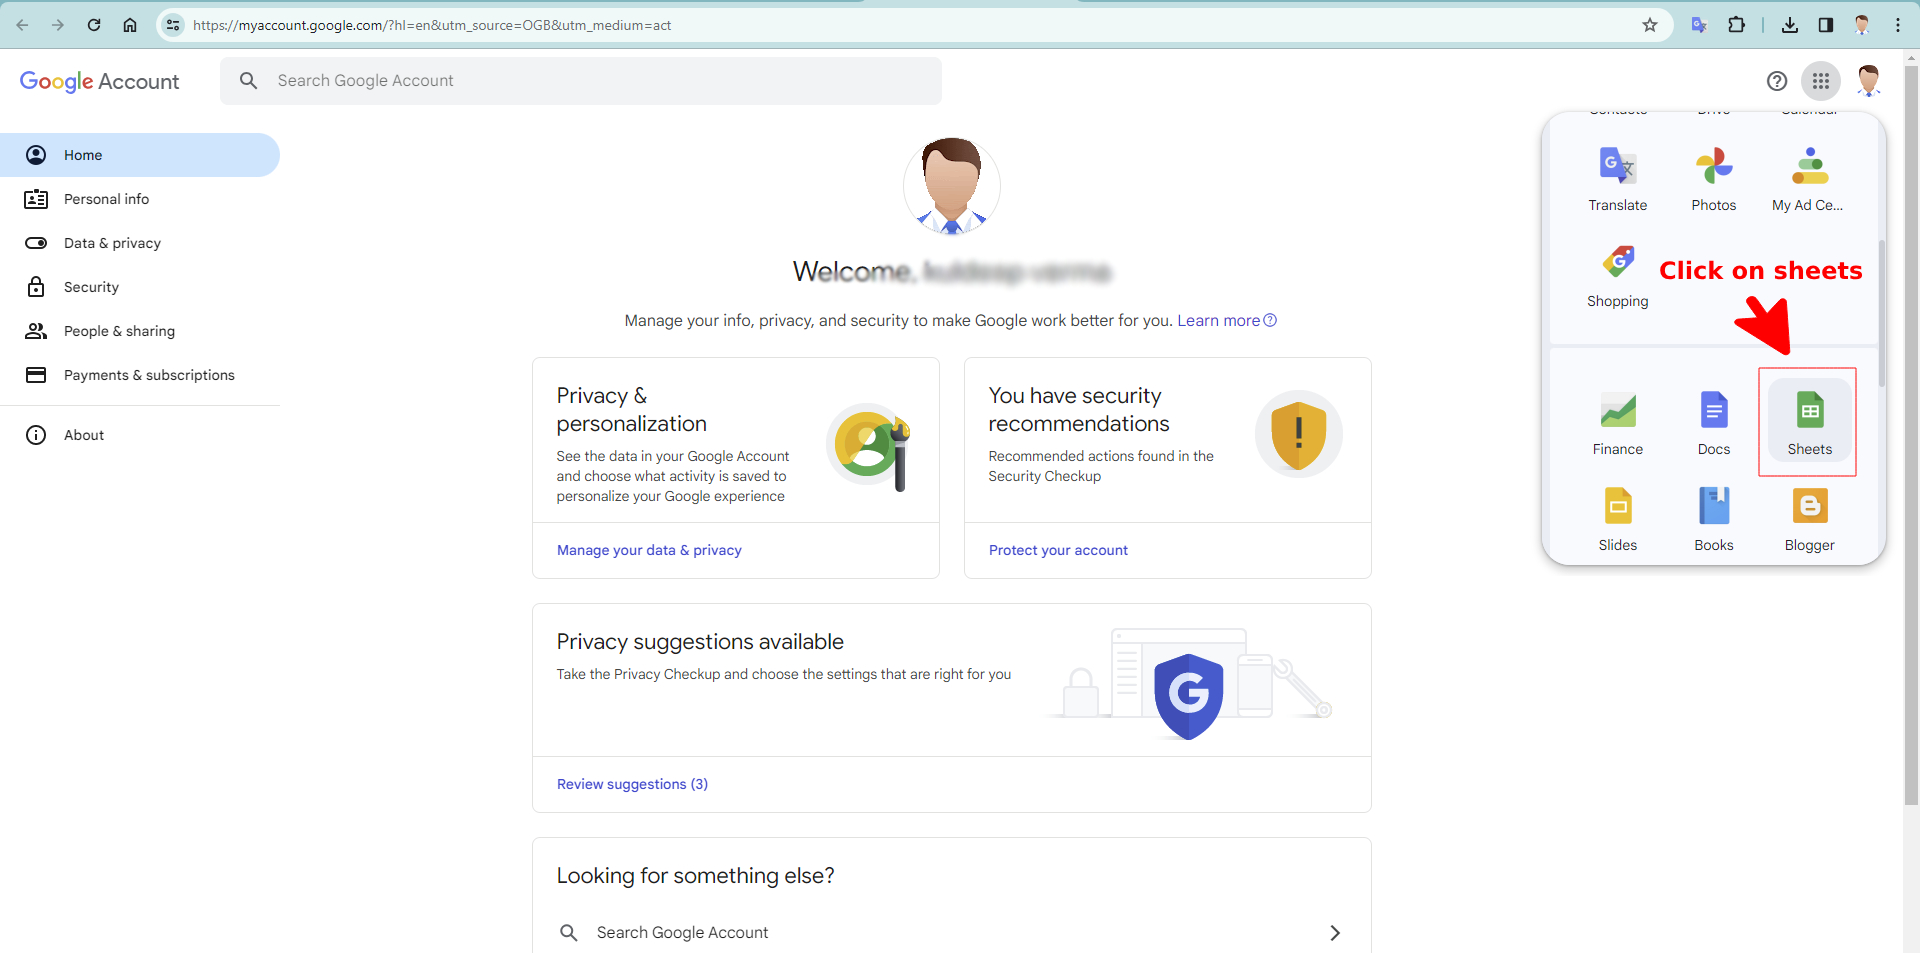
Start a new spreadsheet
Form Integration
Step 2: Generate URL with App Script
Moving on, we now need to generate a Google Sheets app URL that will give us the ability to automatically send data to Google Sheets when we submit our form.
We'll all get along don't worry!
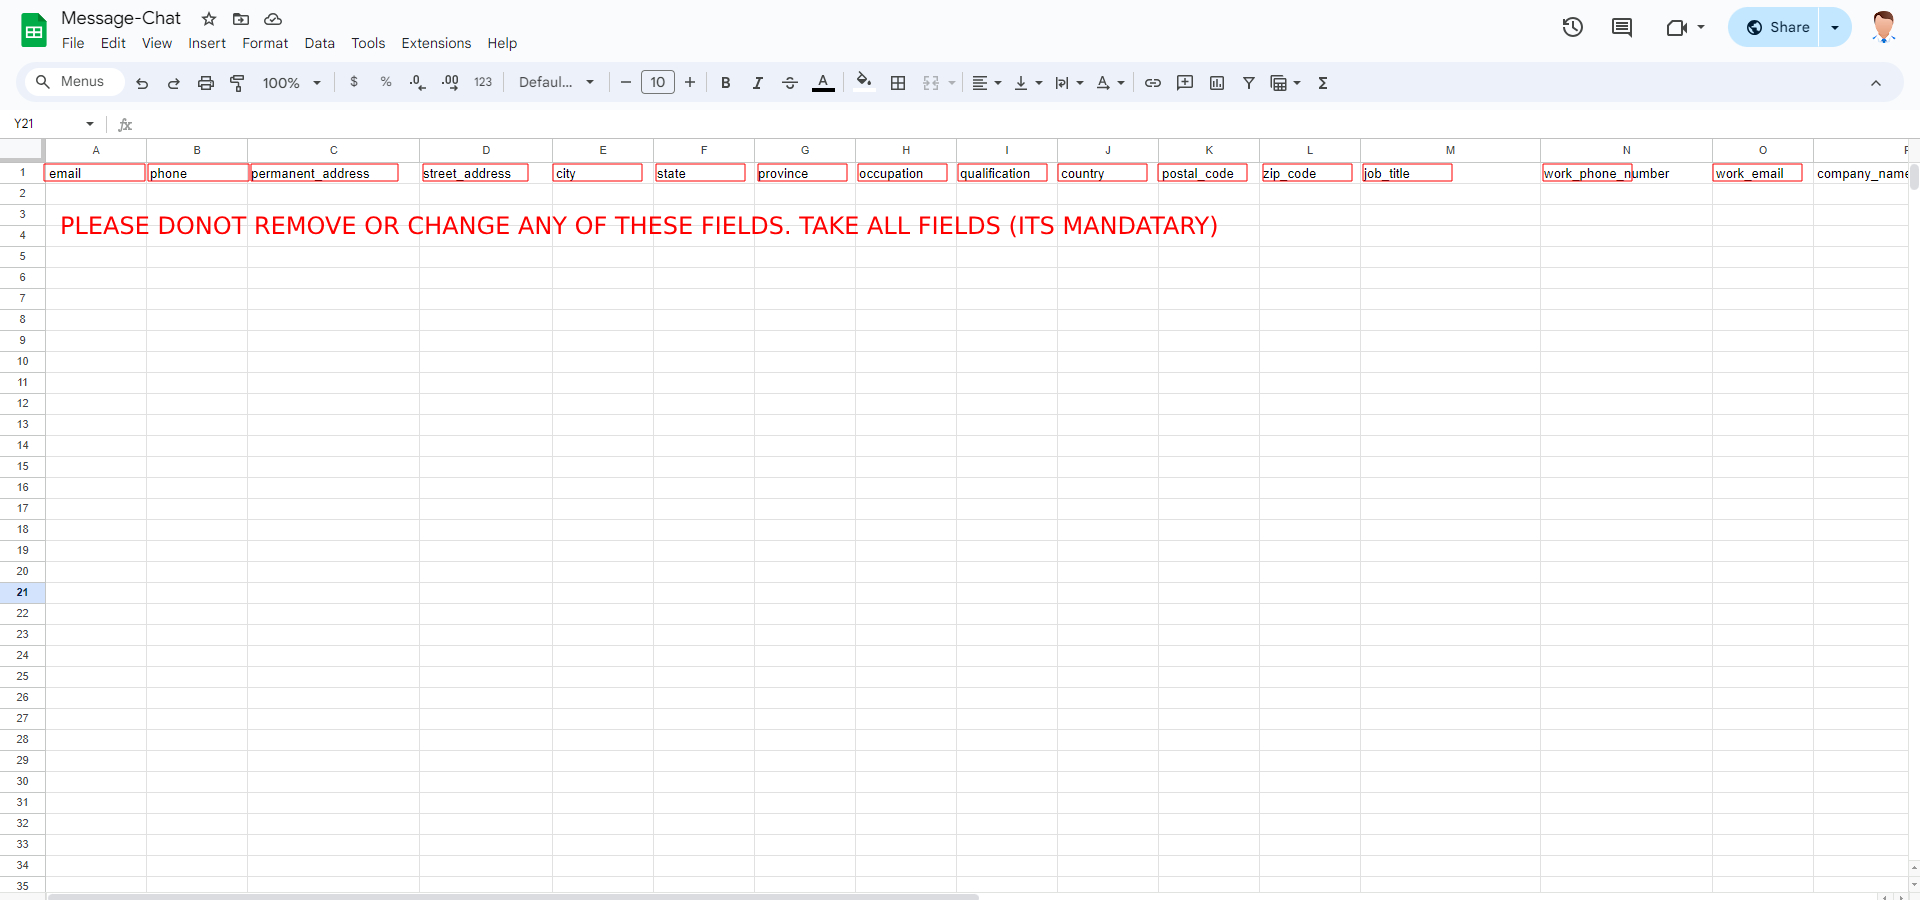
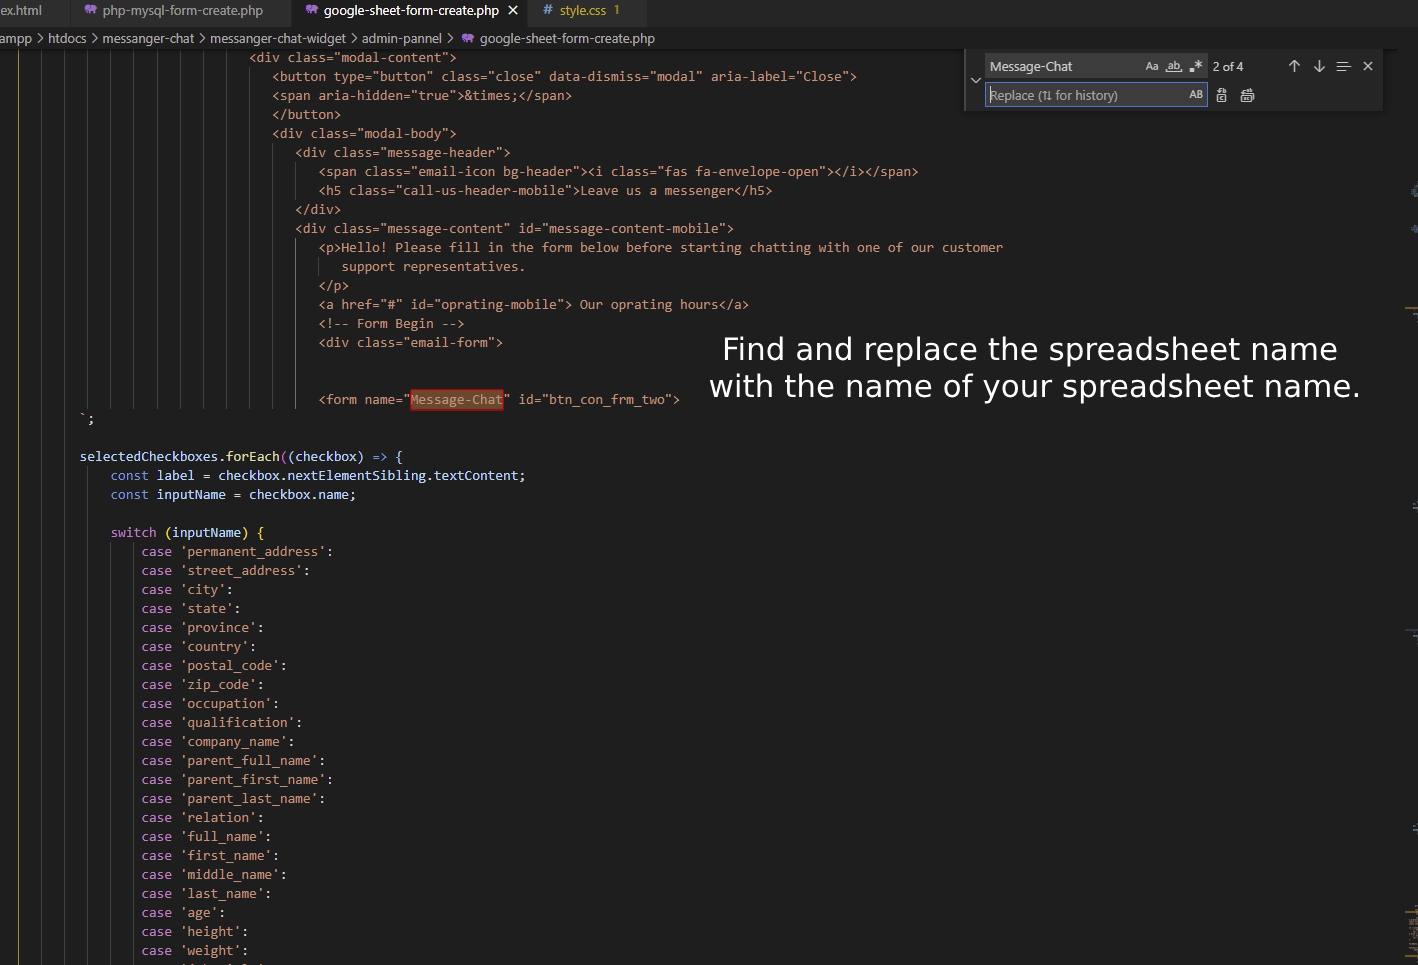
1. We name our Google Spreadsheet “Message-Chat”. You can give a different name. whatever you'd like. I have named it “Message-Chat”. Just remember that we will need this name later.
2. We give our Google Sheets column the same name as our name attribute in the PHP form. Remember our first input field is named "email" and second one is named "phone" and third one is named "permanent_address" and there are many more..
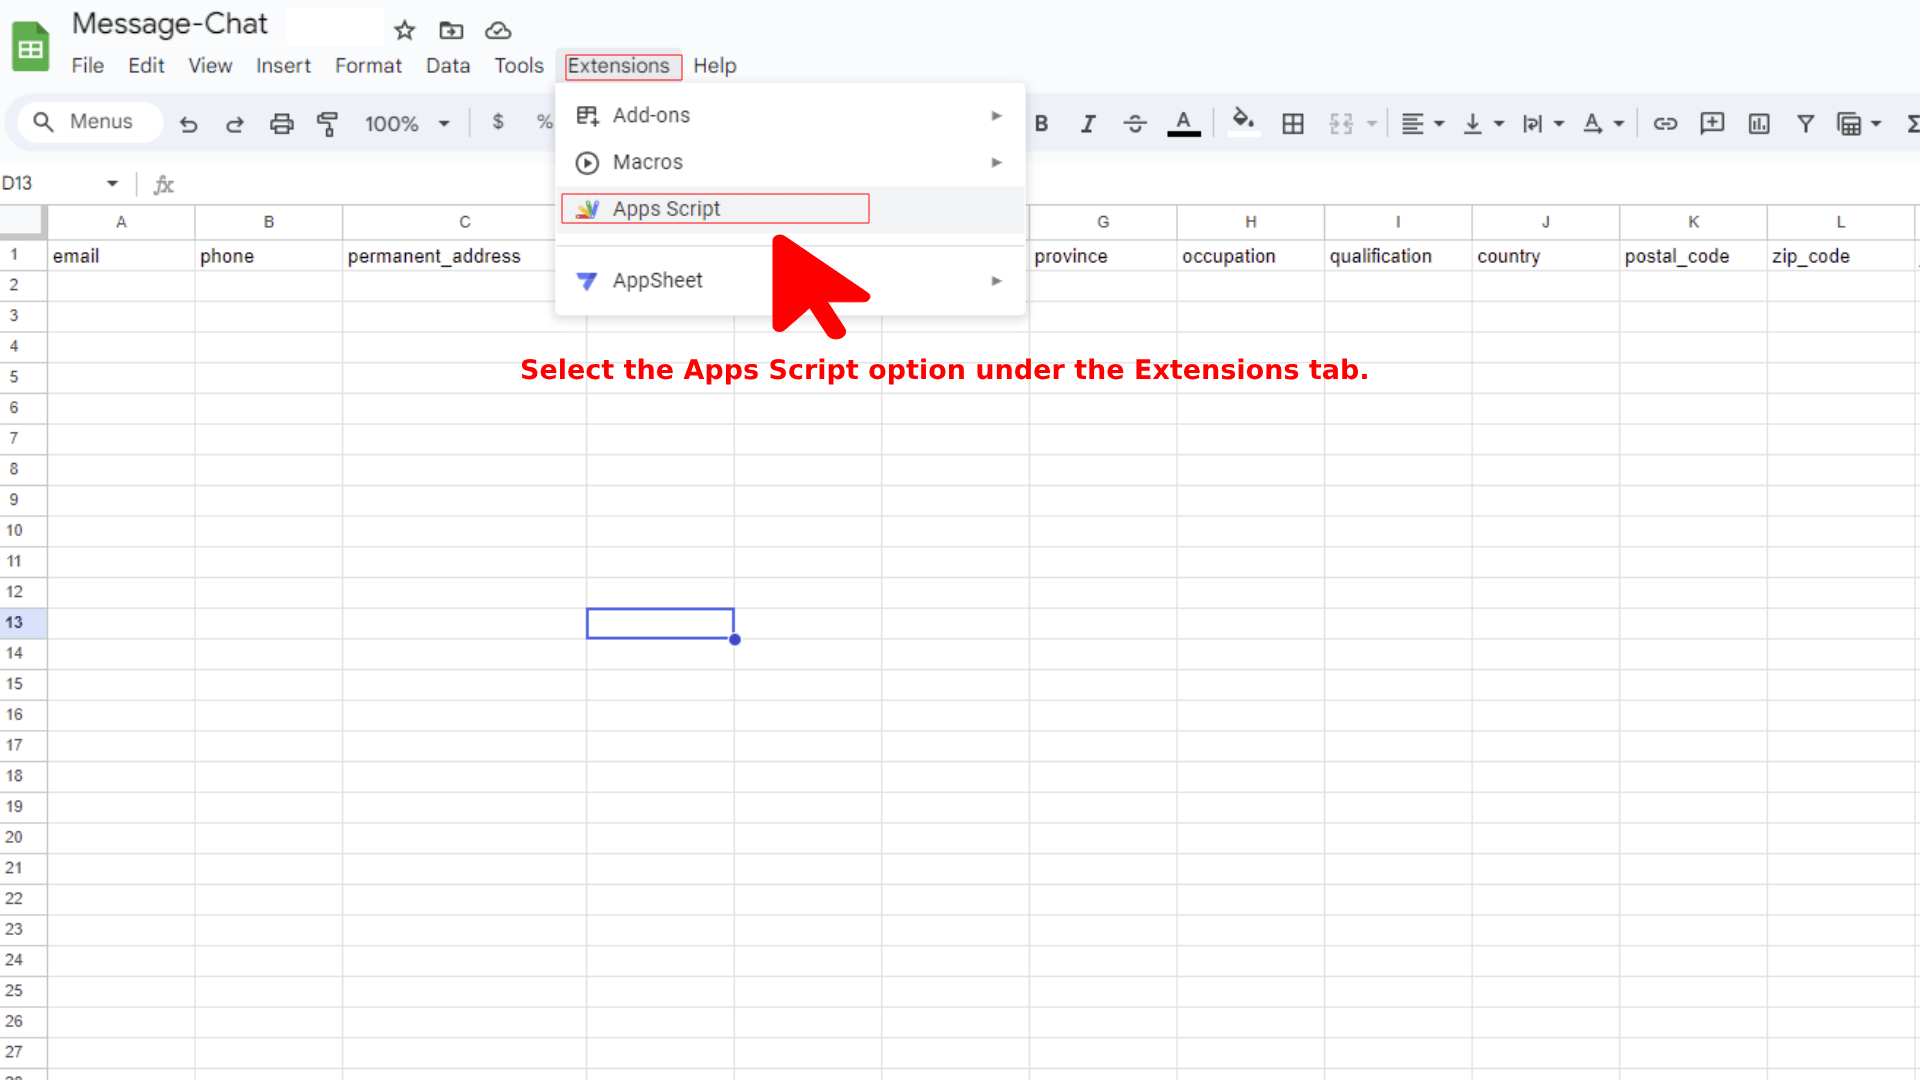
3. Go to the Extension Tab in Google Sheets once the field names have been properly configured. Select the Apps Script function by clicking on it. You will be taken to a different page as a result..
4. In this Apps Script page, you will see a sample code of the JavaScript function.
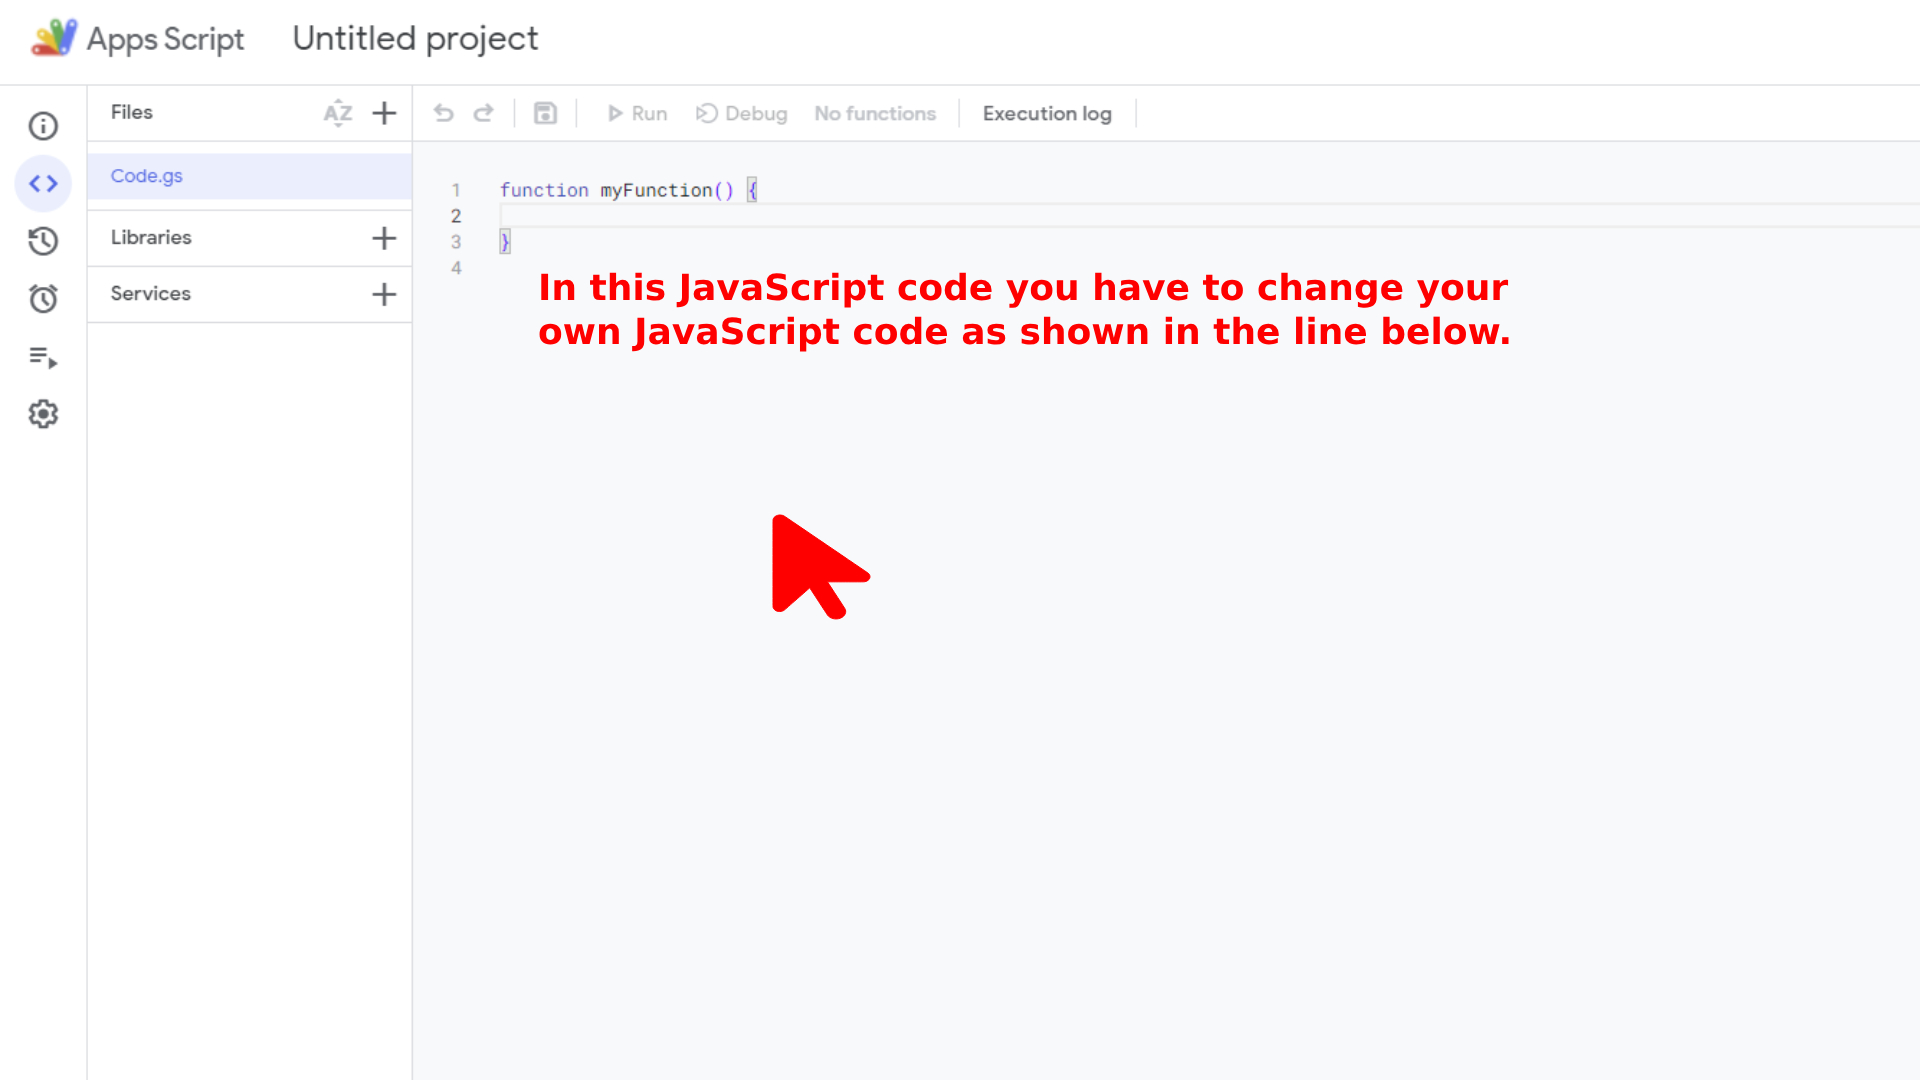
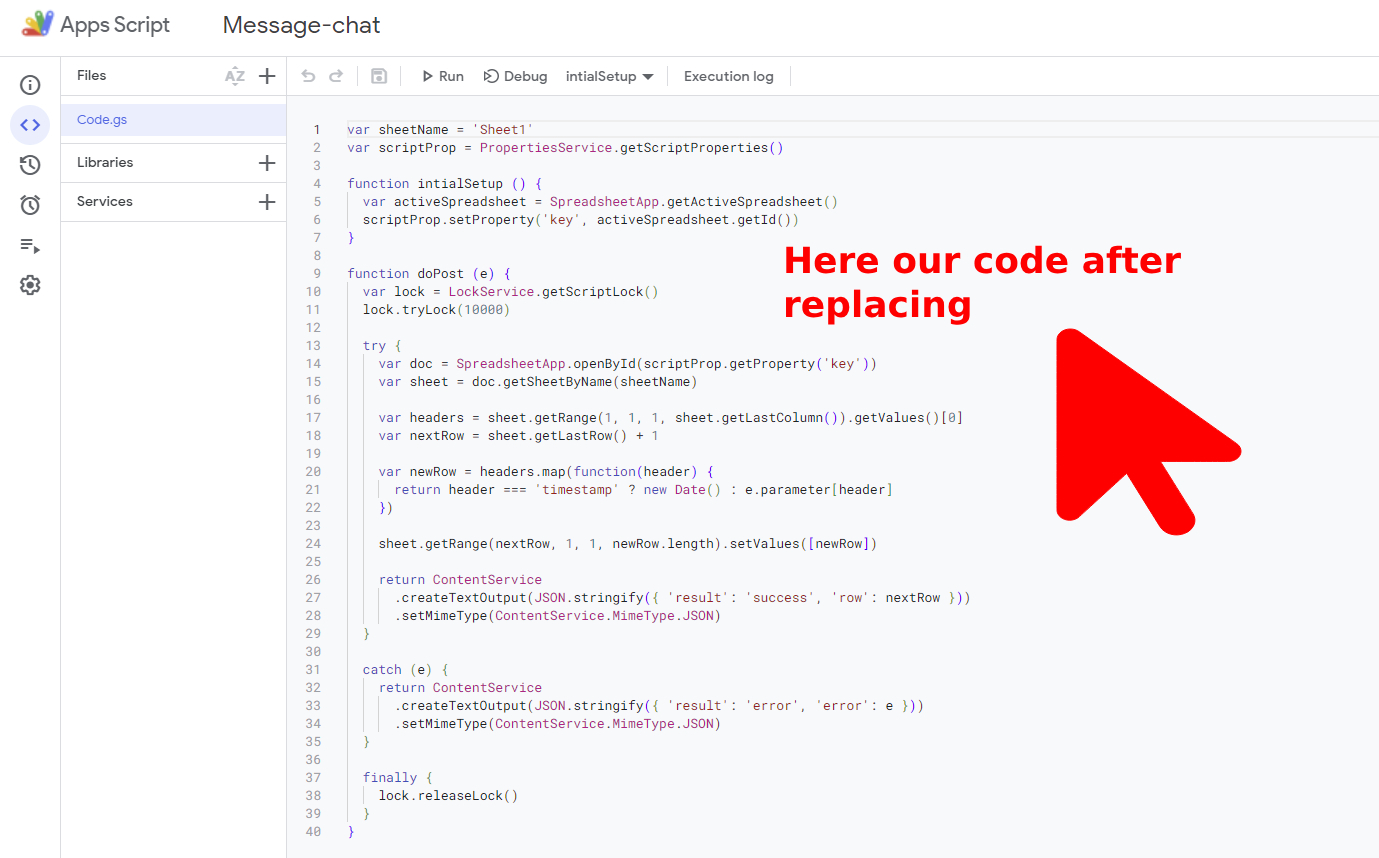
5. We can now just copy and paste our JavaScript code. This is how the code looks:
                            var sheetName = 'Sheet1'
                            var scriptProp = PropertiesService.getScriptProperties()

                            function intialSetup () {
                            var activeSpreadsheet = SpreadsheetApp.getActiveSpreadsheet()
                            scriptProp.setProperty('key', activeSpreadsheet.getId())
                            }

                            function doPost (e) {
                            var lock = LockService.getScriptLock()
                            lock.tryLock(10000)

                            try {
                                var doc = SpreadsheetApp.openById(scriptProp.getProperty('key'))
                                var sheet = doc.getSheetByName(sheetName)

                                var headers = sheet.getRange(1, 1, 1, sheet.getLastColumn()).getValues()[0]
                                var nextRow = sheet.getLastRow() + 1

                                var newRow = headers.map(function(header) {
                                return header === 'timestamp' ? new Date() : e.parameter[header]
                                })

                                sheet.getRange(nextRow, 1, 1, newRow.length).setValues([newRow])

                                return ContentService
                                .createTextOutput(JSON.stringify({ 'result': 'success', 'row': nextRow }))
                                .setMimeType(ContentService.MimeType.JSON)
                            }

                            catch (e) {
                                return ContentService
                                .createTextOutput(JSON.stringify({ 'result': 'error', 'error': e }))
                                .setMimeType(ContentService.MimeType.JSON)
                            }

                            finally {
                                lock.releaseLock()
                            }
                            }
Here our code after replacing
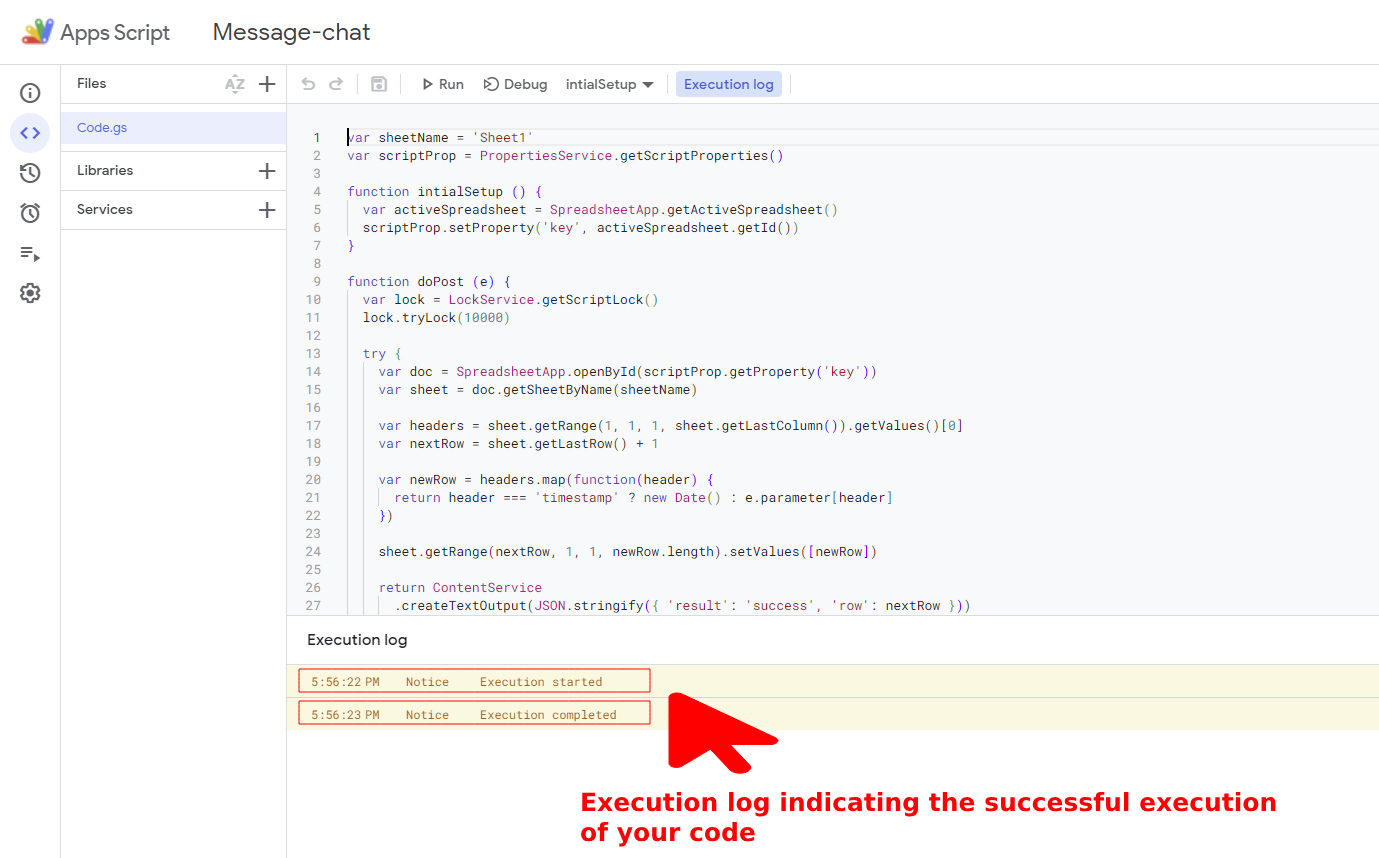
6. Next, we just run our Apps Script.

7. After running the script, Google will ask you to allow the script to run.

8. Execution log indicating the successful execution of your code
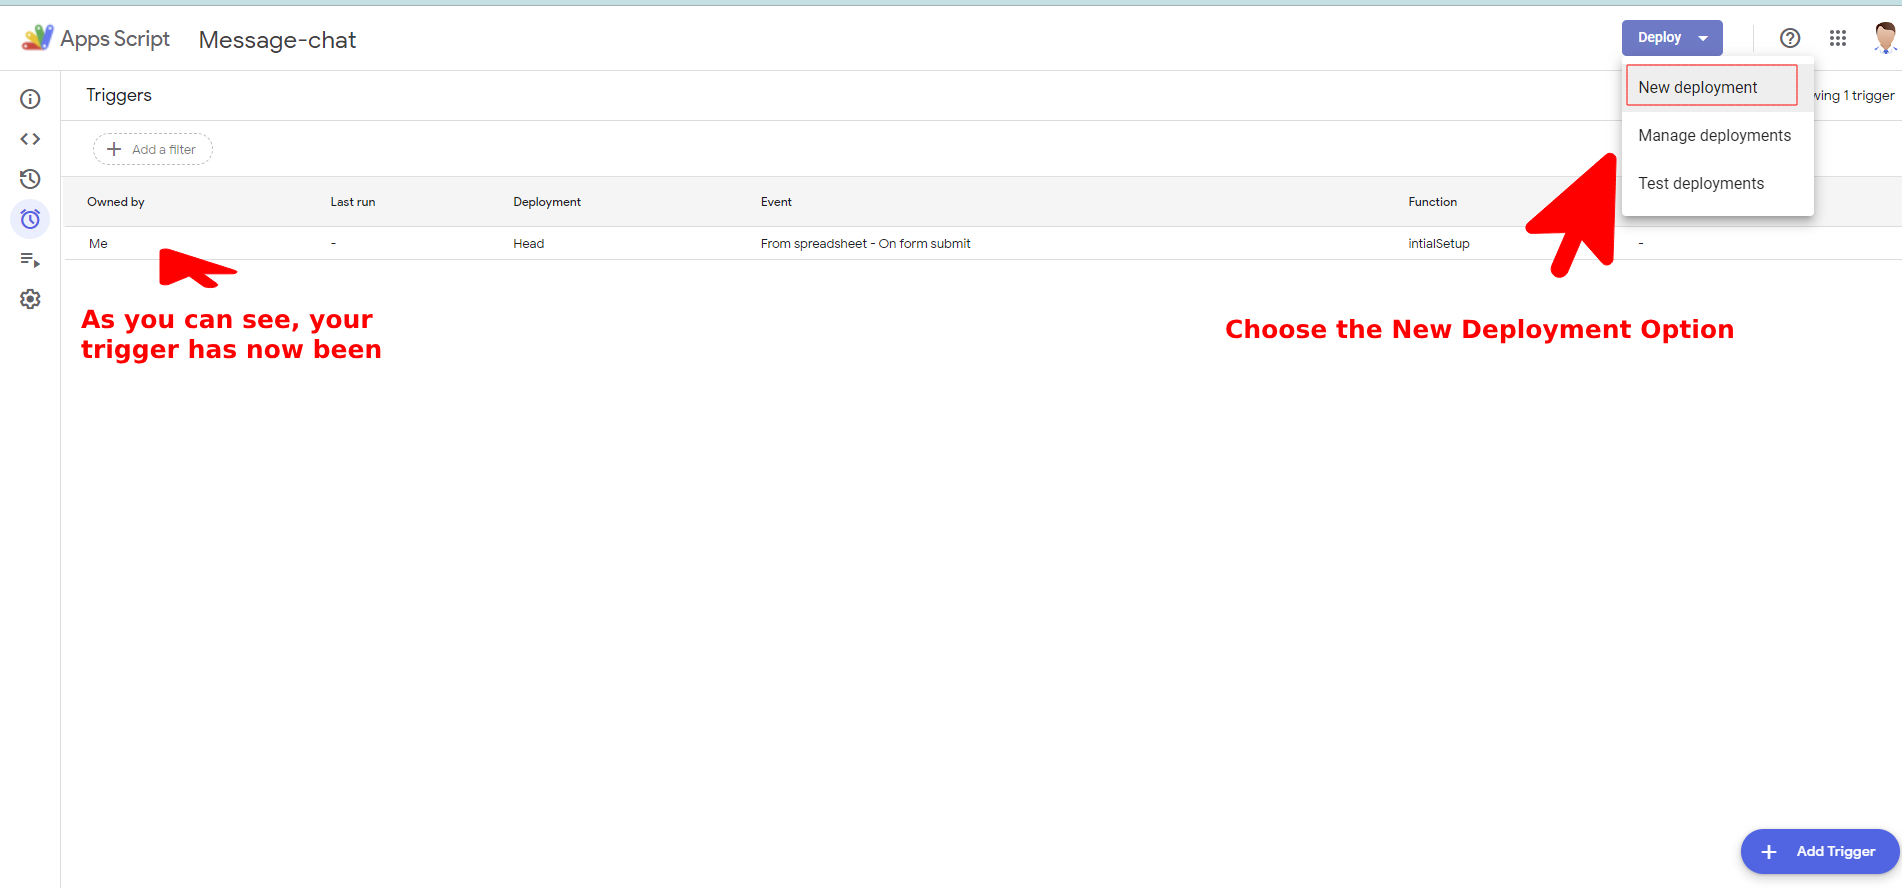
9. The next step in the PHP form submit for our Google Apps script is to Add a trigger and select the appropriate option for it. which are listed below:
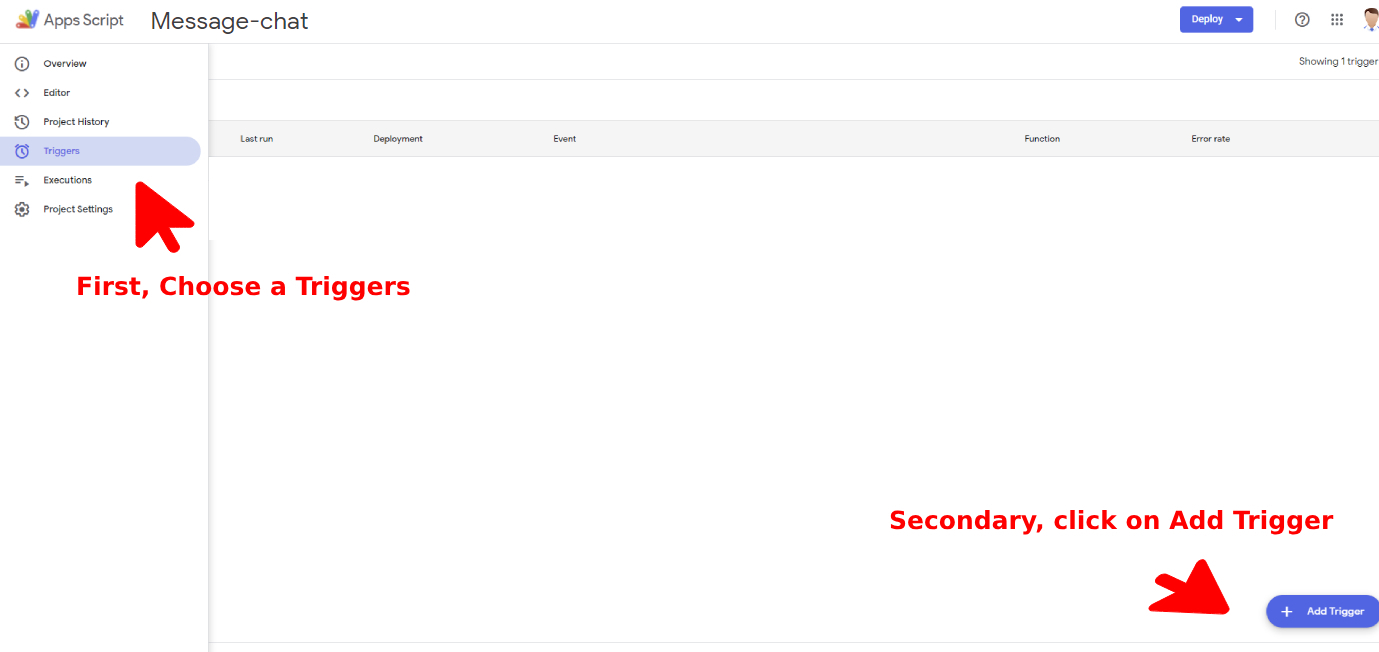
10. Add Trigger for Message-Chat

11. Now that Apps Script has a trigger attached to it. Here, we select the newly available deployment option by clicking the Deploy button.
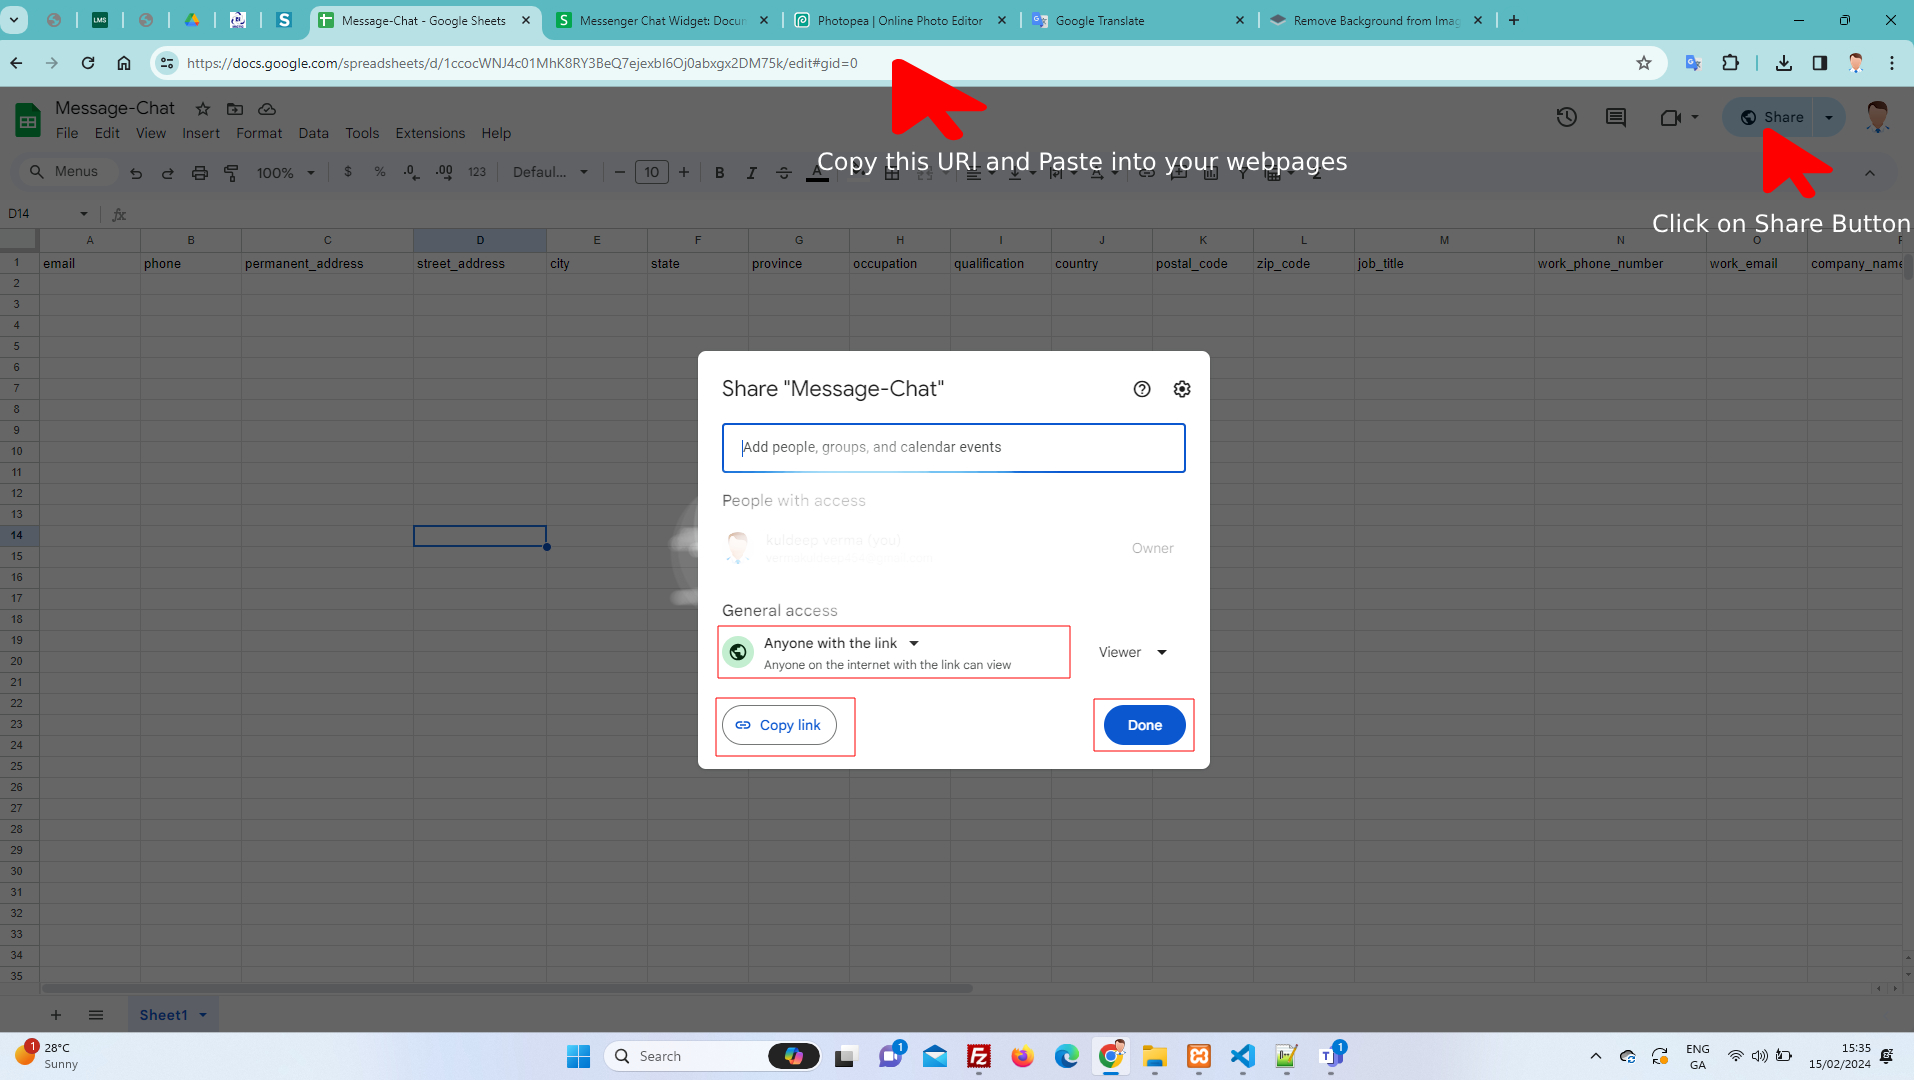
12. We must grant access to all when we publish the Apps Script. Select "Anyone" under the "who has access" option. However, you may be asked to grant access. Finally, your deployment URL will appear.

13. Now you have to share the link.
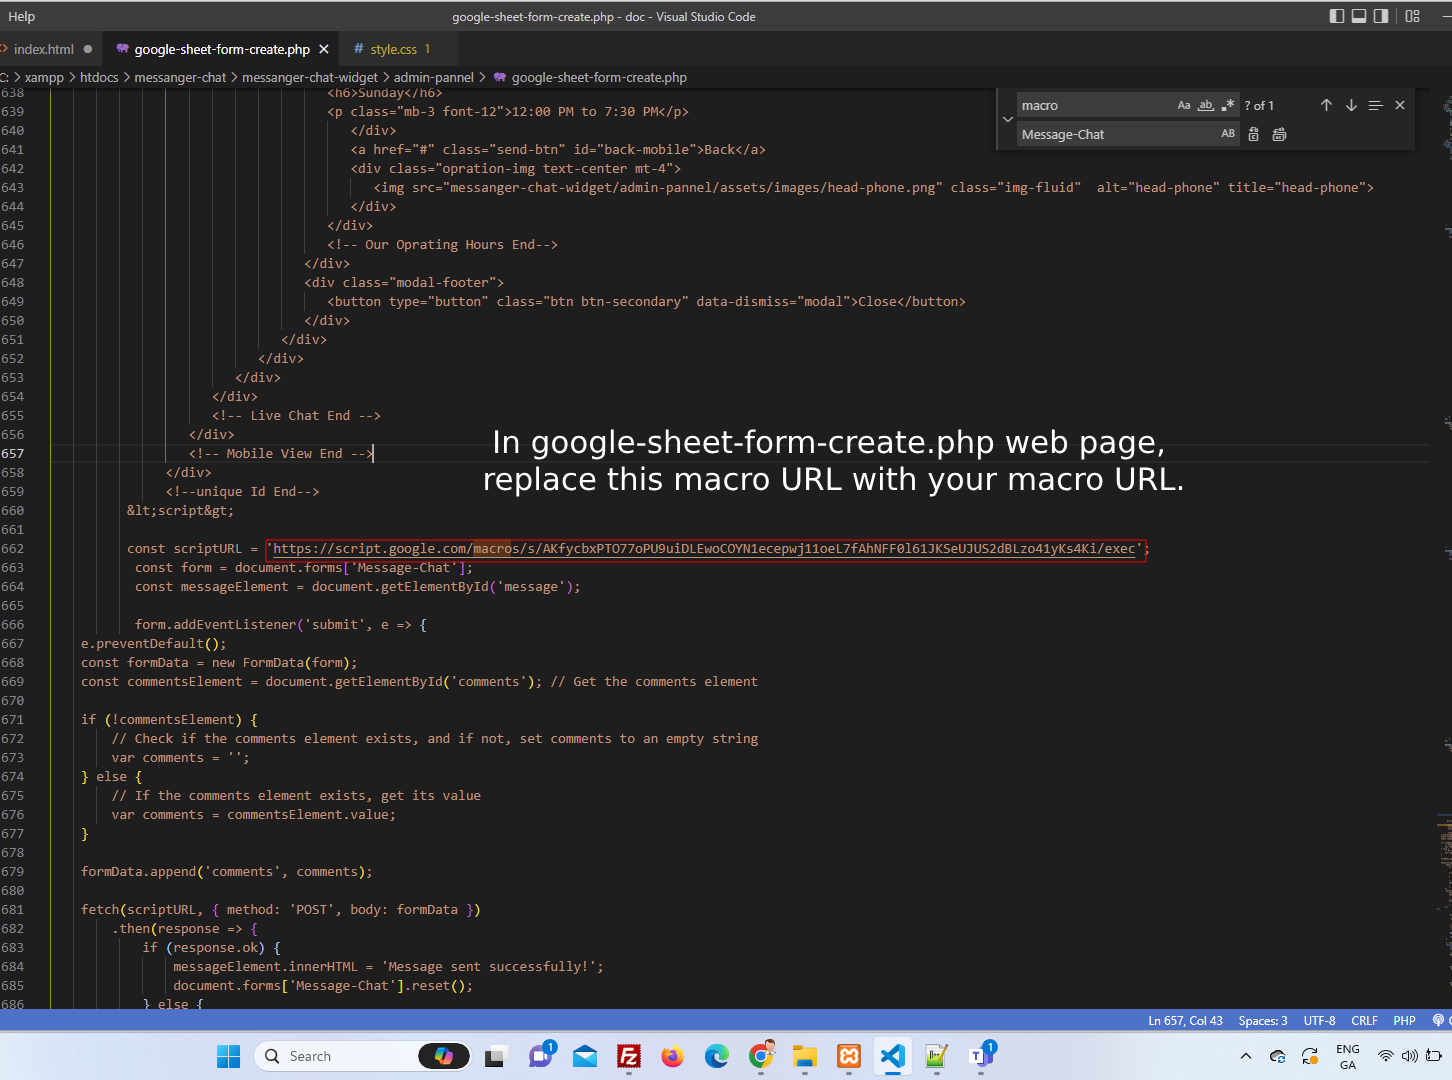
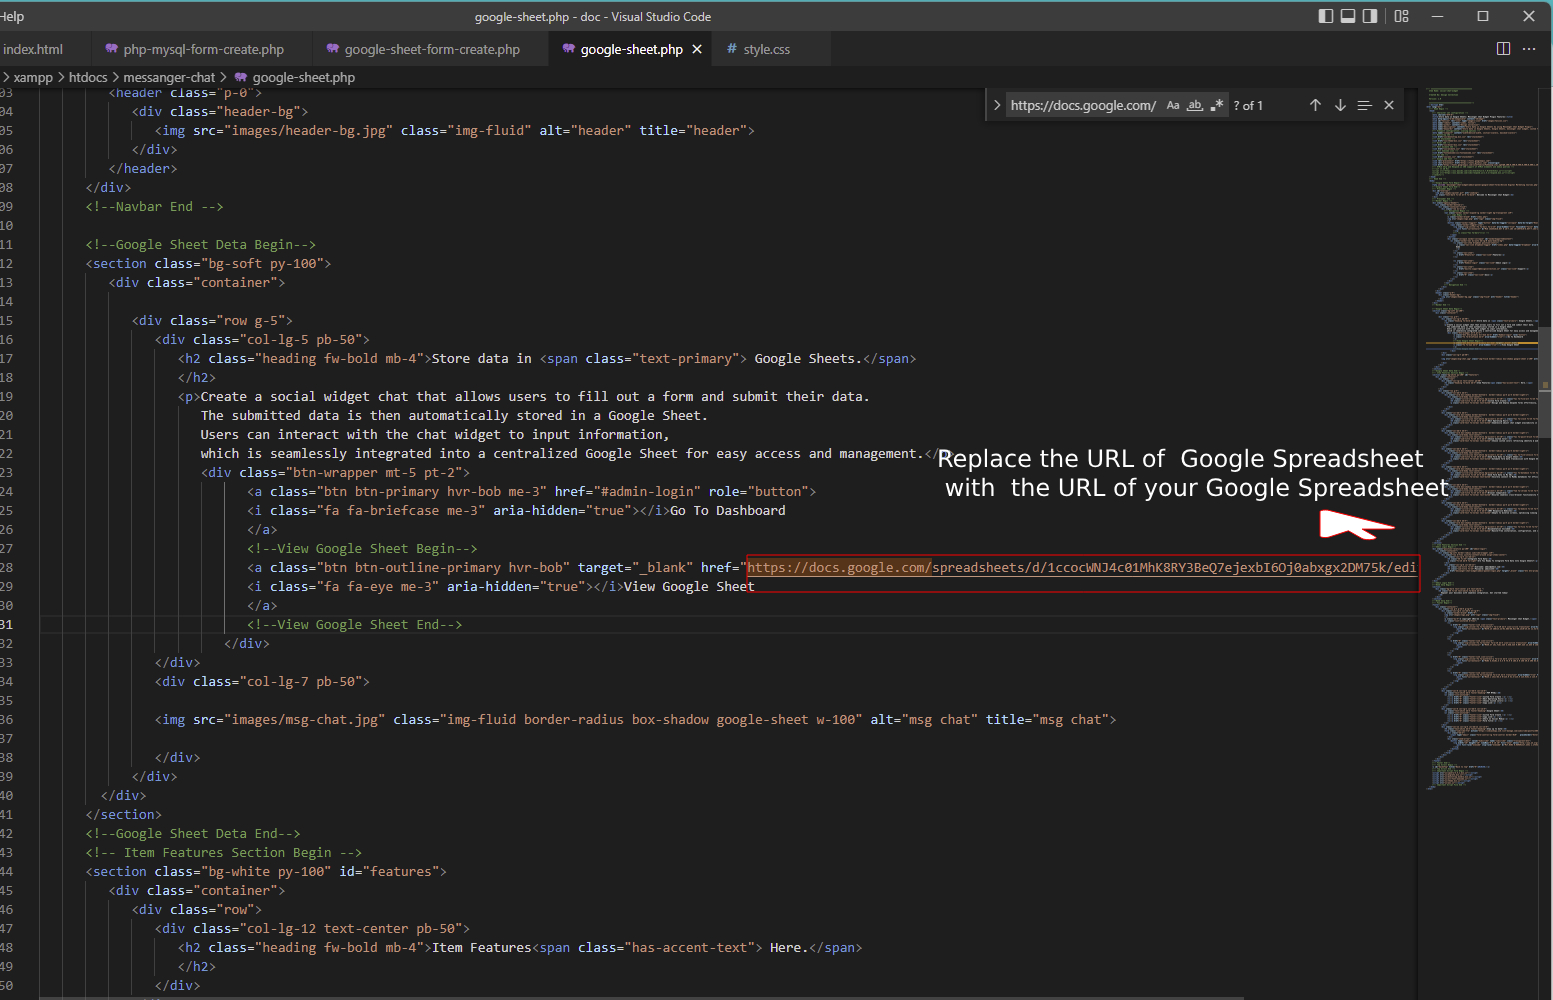
14. You must paste the URL of the Google Spreadsheet into the google-sheet.php web pages, which will be located in the root directory.
Congratulations! Your Setup hasbeen Completed
Support
If you have any questions, feel free to contact us at support@designcollection.in.