Step-by-Step Guide to Installing a Lead Management System for Facebook, Google, LinkedIn, and Quora

Installing Lead Management System for Facebook, Google, LinkedIn, and Quora
Installing Lead Management System is a crucial step for businesses aiming to streamline their processes. Installing Lead Management System enables you to effectively manage leads from platforms such as Facebook, Google, LinkedIn, and Quora. By following this guide, you will learn how to set up and configure the system efficiently to enhance your lead management capabilities.
Step No.1: Buy Domain and Hosting Plan
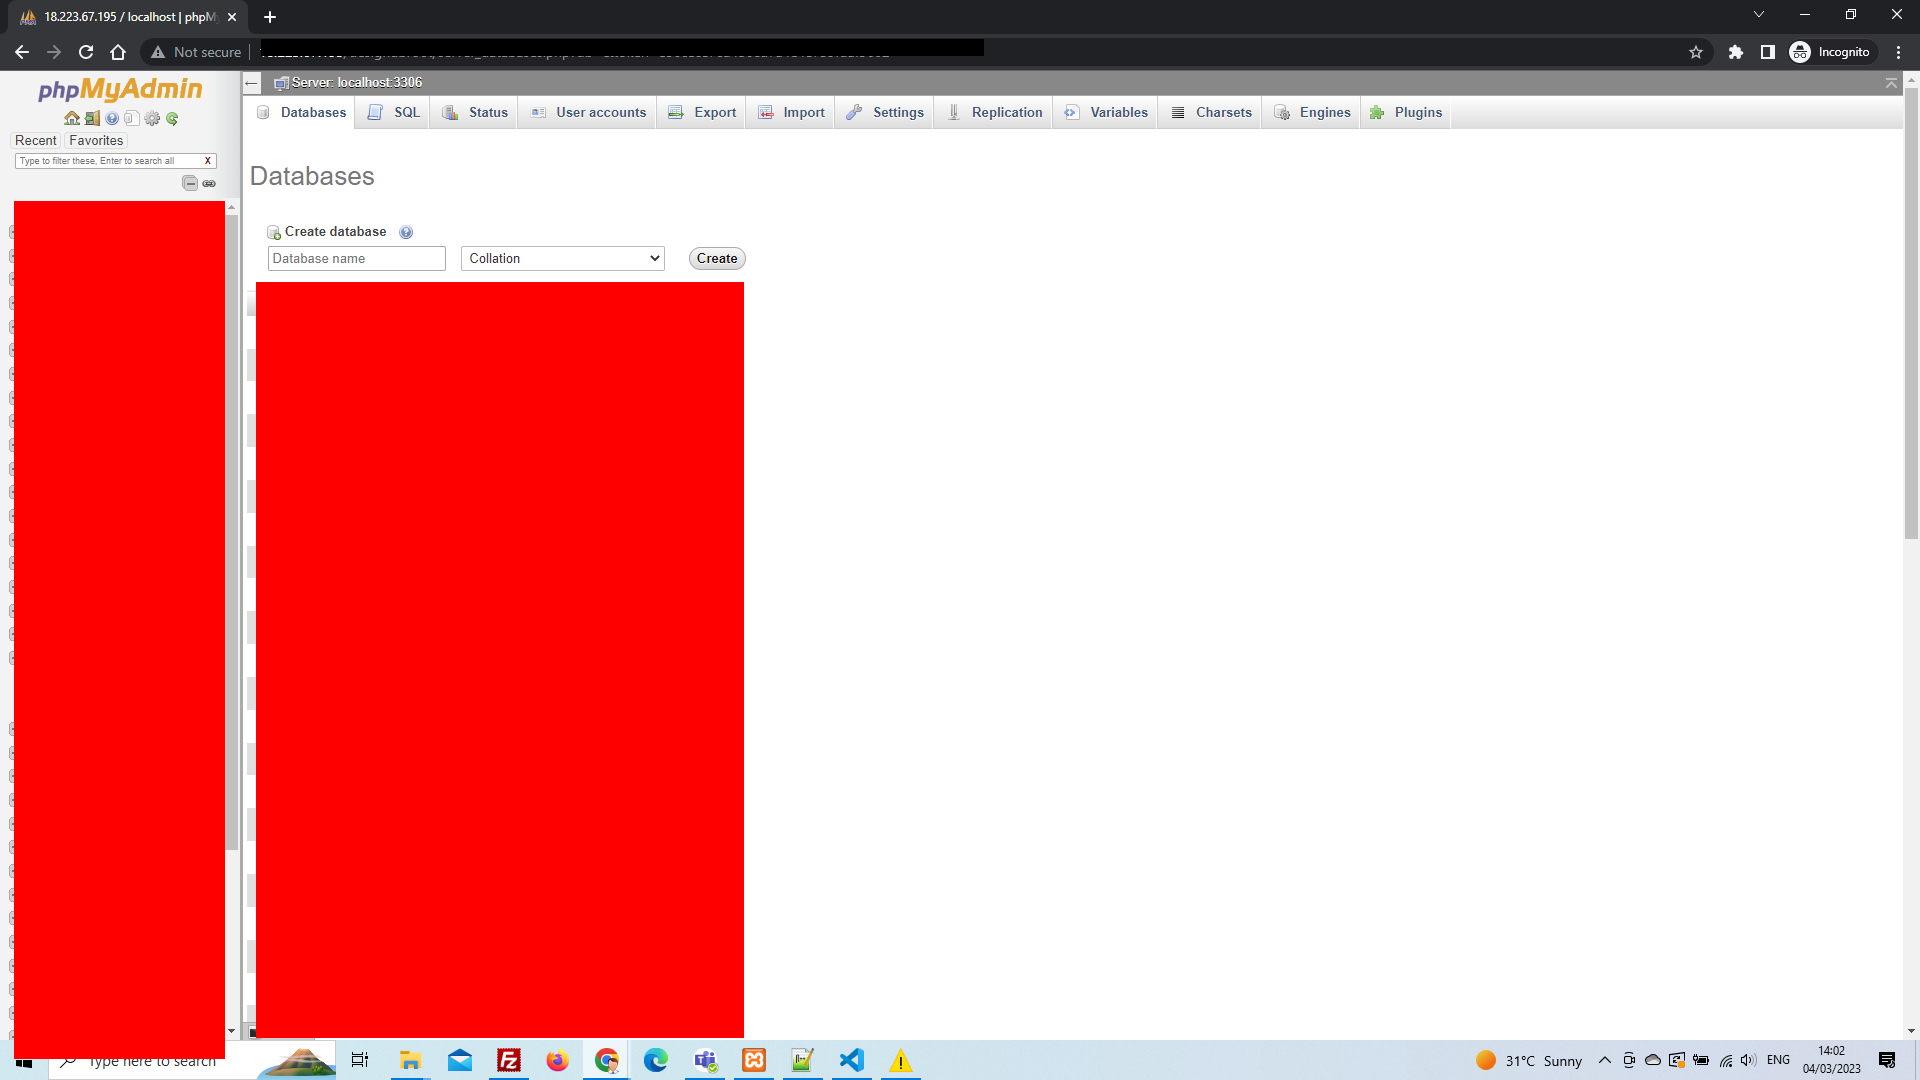
To begin, purchase a suitable domain and hosting plan. Once you have acquired it, you will receive access to a cPanel. After logging in, you should navigate to phpMyAdmin under the database section. Please ensure that the PHP version is 7.2.24, as it is required for the proper functioning of phpMyAdmin. For more details about hosting plans, refer to our Hosting Guide.
Step No.2: Connect to the Database in phpMyAdmin
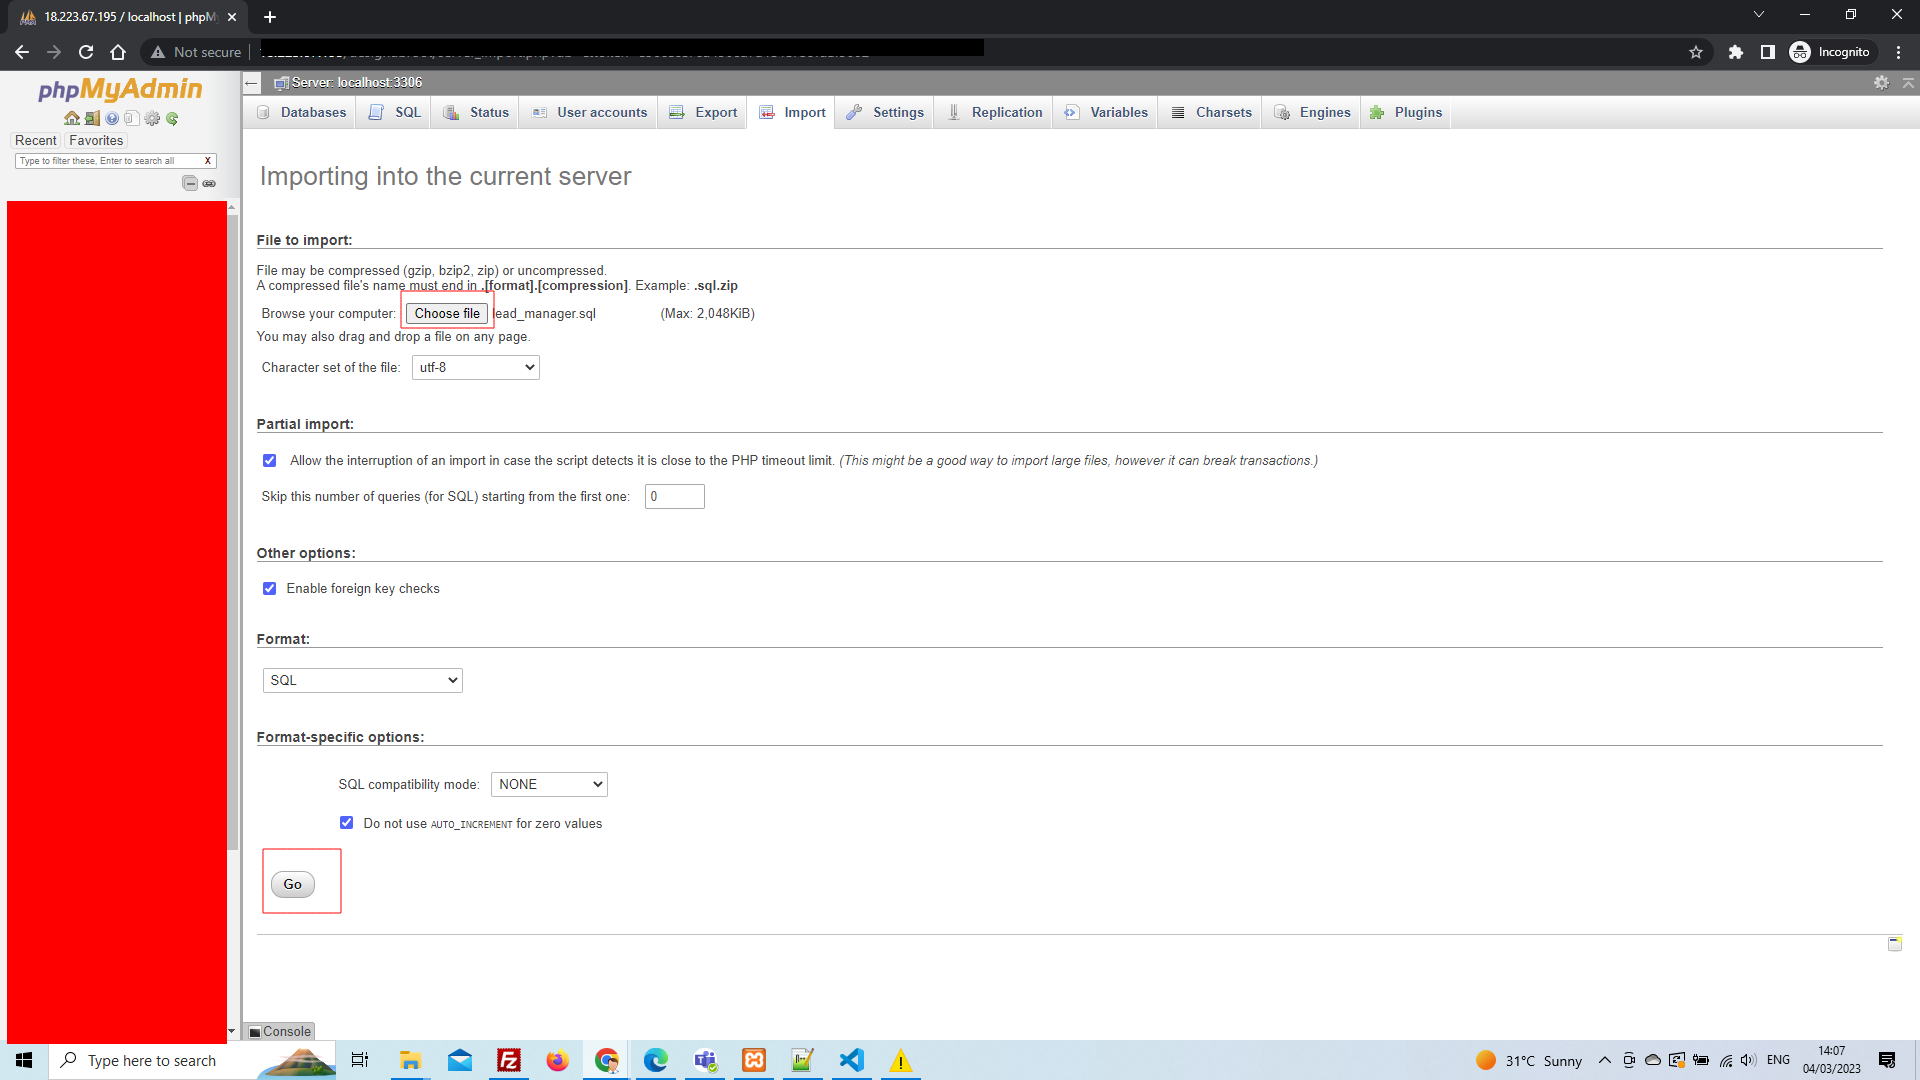
First, create a database with the name lead_manager. Once the database is created, proceed to import the lead_manager.sql file to populate the required tables. Learn more about setting up databases.

After completing this step, ensure that no errors occurred during the import process.

Step No.3: Configure the Database
Next, in the cPanel, navigate to the File Manager and open the public_html directory. After placing your project folder here, open the Config folder. Inside this folder, locate the coredb.php file. Open it and enter the database username and password that you created earlier. Make sure to save the changes before proceeding further. For a detailed walkthrough, visit our Database Configuration Guide.
Step No.4: Log In to the Dashboard
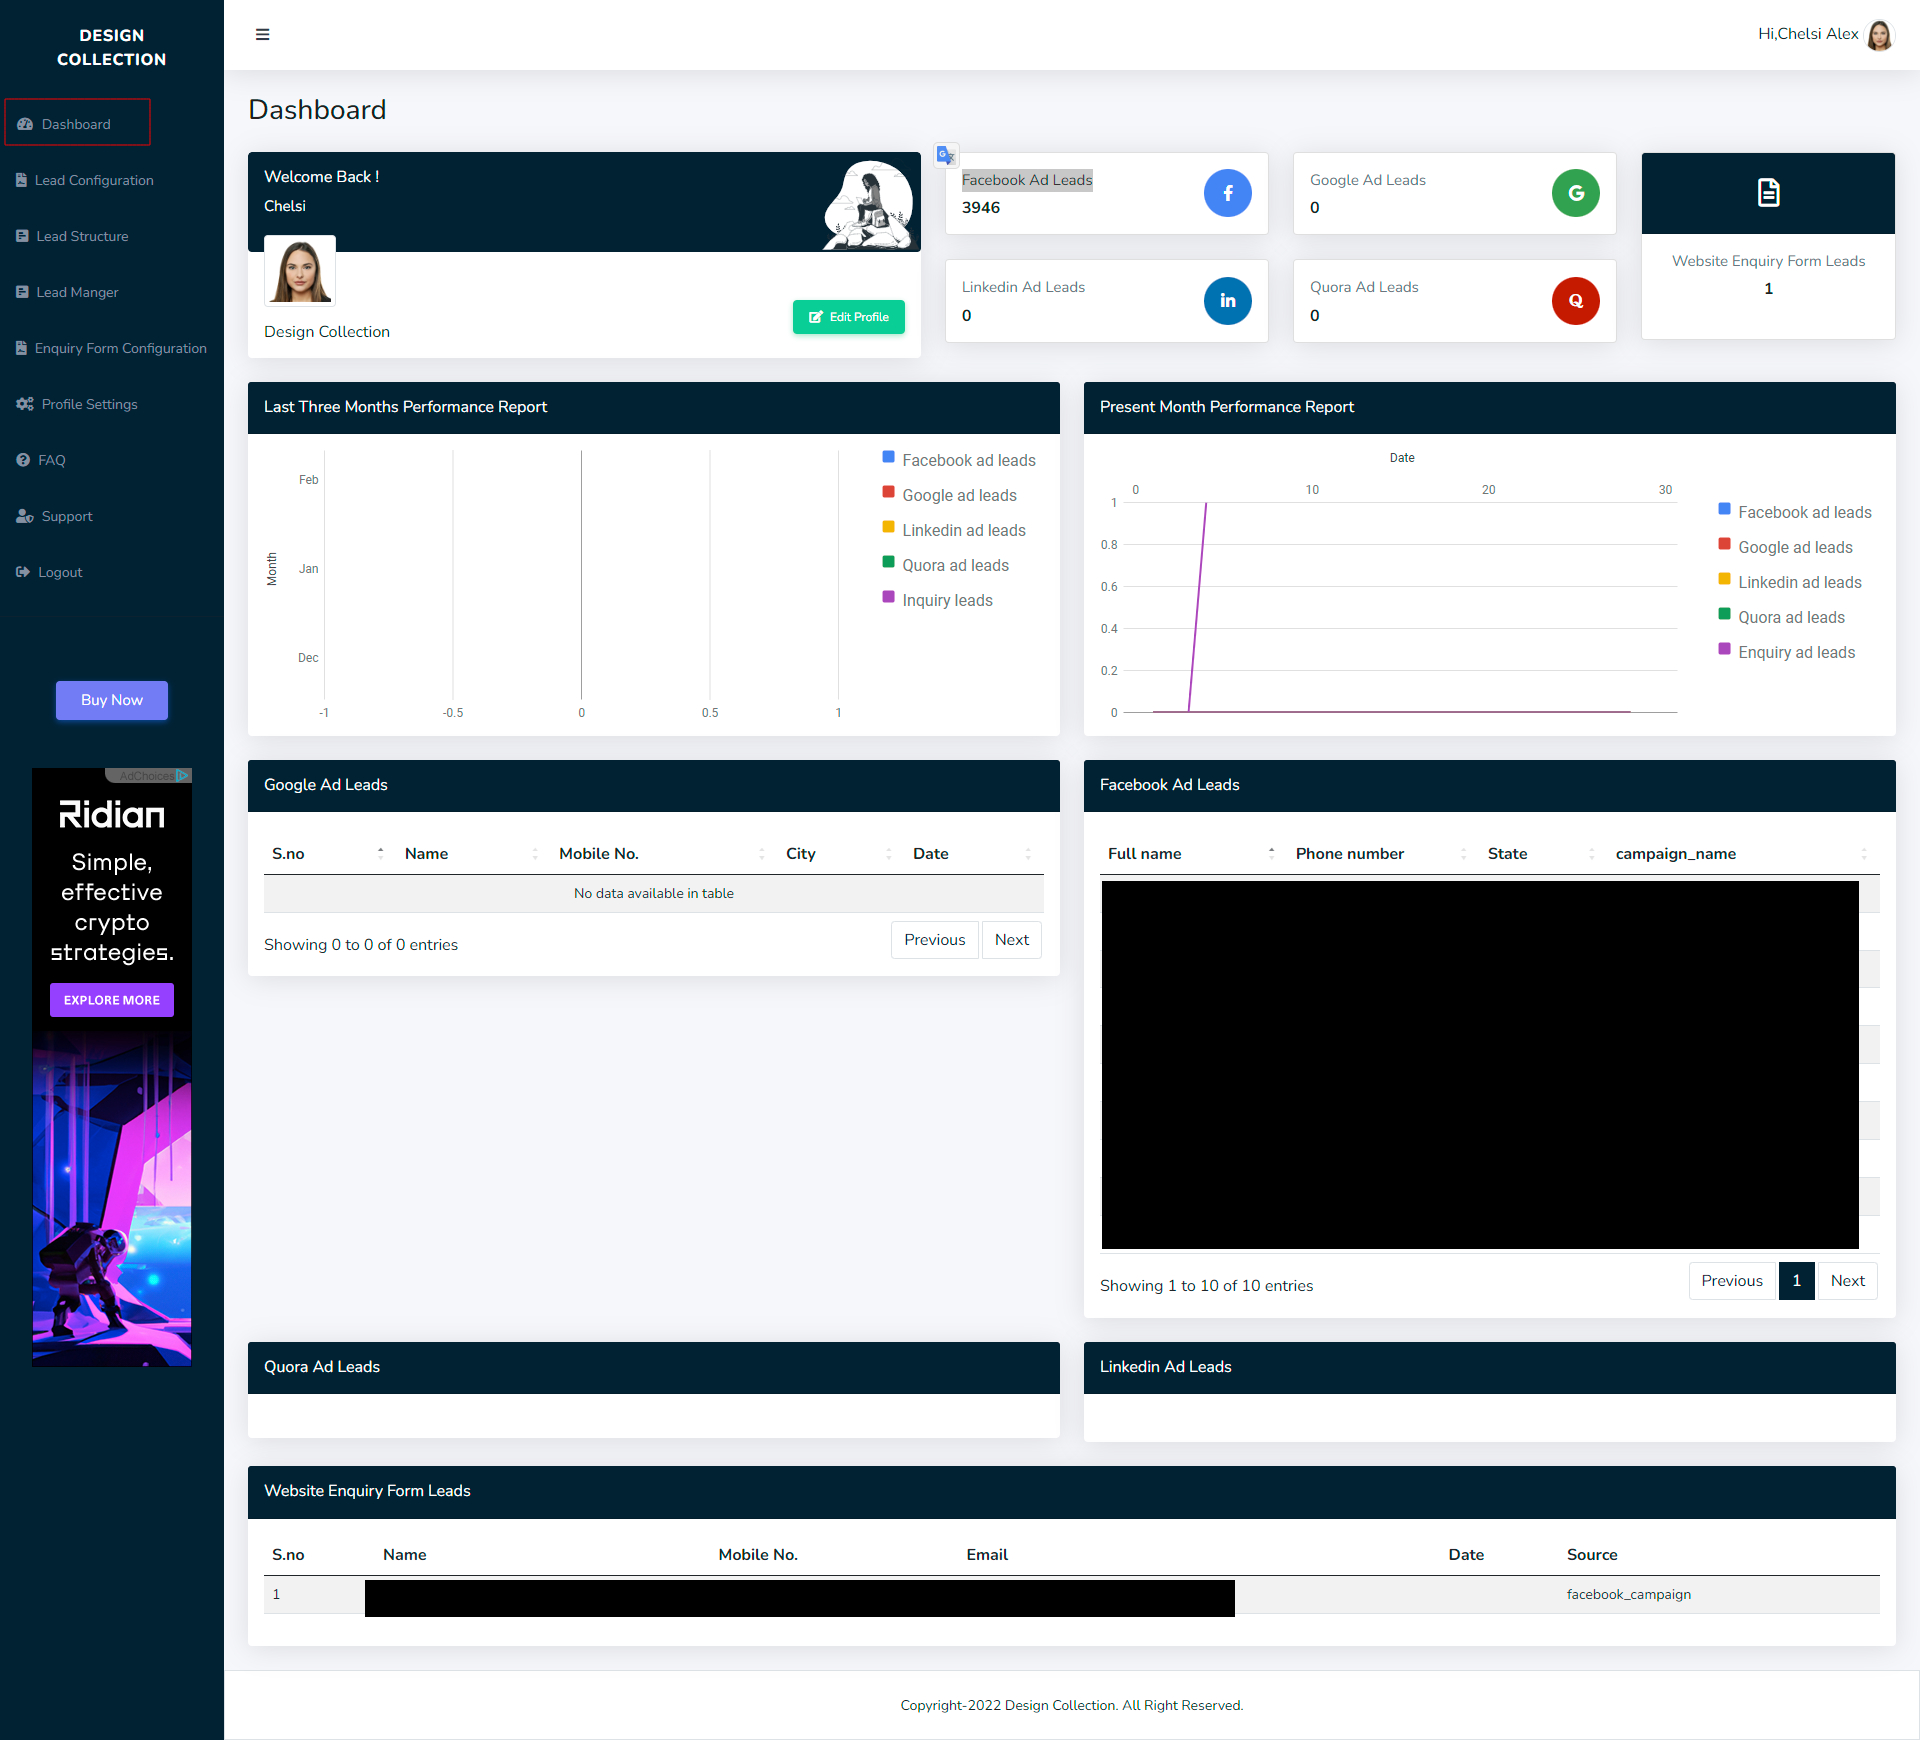
After successfully setting up the database, log in to the Lead Management System. At this stage, you will see a dashboard displaying leads from various sources, including Facebook Ads, Google Ads, LinkedIn Ads, and Quora Ads. Use this dashboard to monitor and manage your leads effectively. Explore our Dashboard Overview for additional tips and tricks.

Step No.5: Lead Configuration
To enable lead integration from any source, you need to configure the system accordingly. For example:
- If you are using Facebook leads, use API Nation CRM to streamline the integration process. Learn more about this CRM here.
- If you are handling multiple sources, such as Facebook, Quora, and LinkedIn, consider using Zapier CRM for seamless connectivity. Check our Zapier Integration Guide.
To integrate a Facebook lead using API Nation, follow these steps carefully:
- Select the source of your leads.
- Paste the spreadsheet code provided by Facebook.
- Save the settings to ensure changes are applied.
- Set up your Facebook field structure by navigating to the Lead Structure menu.
- Reload the Facebook Ads Lead section under the Lead Manager menu to verify the changes.
Once done, the leads will be populated in the spreadsheet format, allowing you to track and analyze them efficiently.
Step No.6: Enquiry Form Configuration
Our pre-designed enquiry form is a flexible web-based tool that can be customized from the Form Settings option. For instance, you can change the titles, headers, or other elements to suit your requirements. Any visitor can fill out this form, and their details will automatically be saved in the database for your reference. Refer to our Enquiry Form Guide for more details.
Key Features:
- Enquiry Form URL: Generate leads from various sources by selecting the appropriate source.
- Form Settings: Customize subtitles, titles, headers, footers, images, and more.
- Country Codes: A default worldwide country code list is provided, but you can select specific ones as needed for better accuracy.
thanks.php file in any editor tool to include your specific requirements.
After configuration, check the dashboard to see leads categorized by sources, such as Facebook campaigns. This versatility allows you to expand your business and capture a broader audience efficiently.
Step No.7: Profile Settings
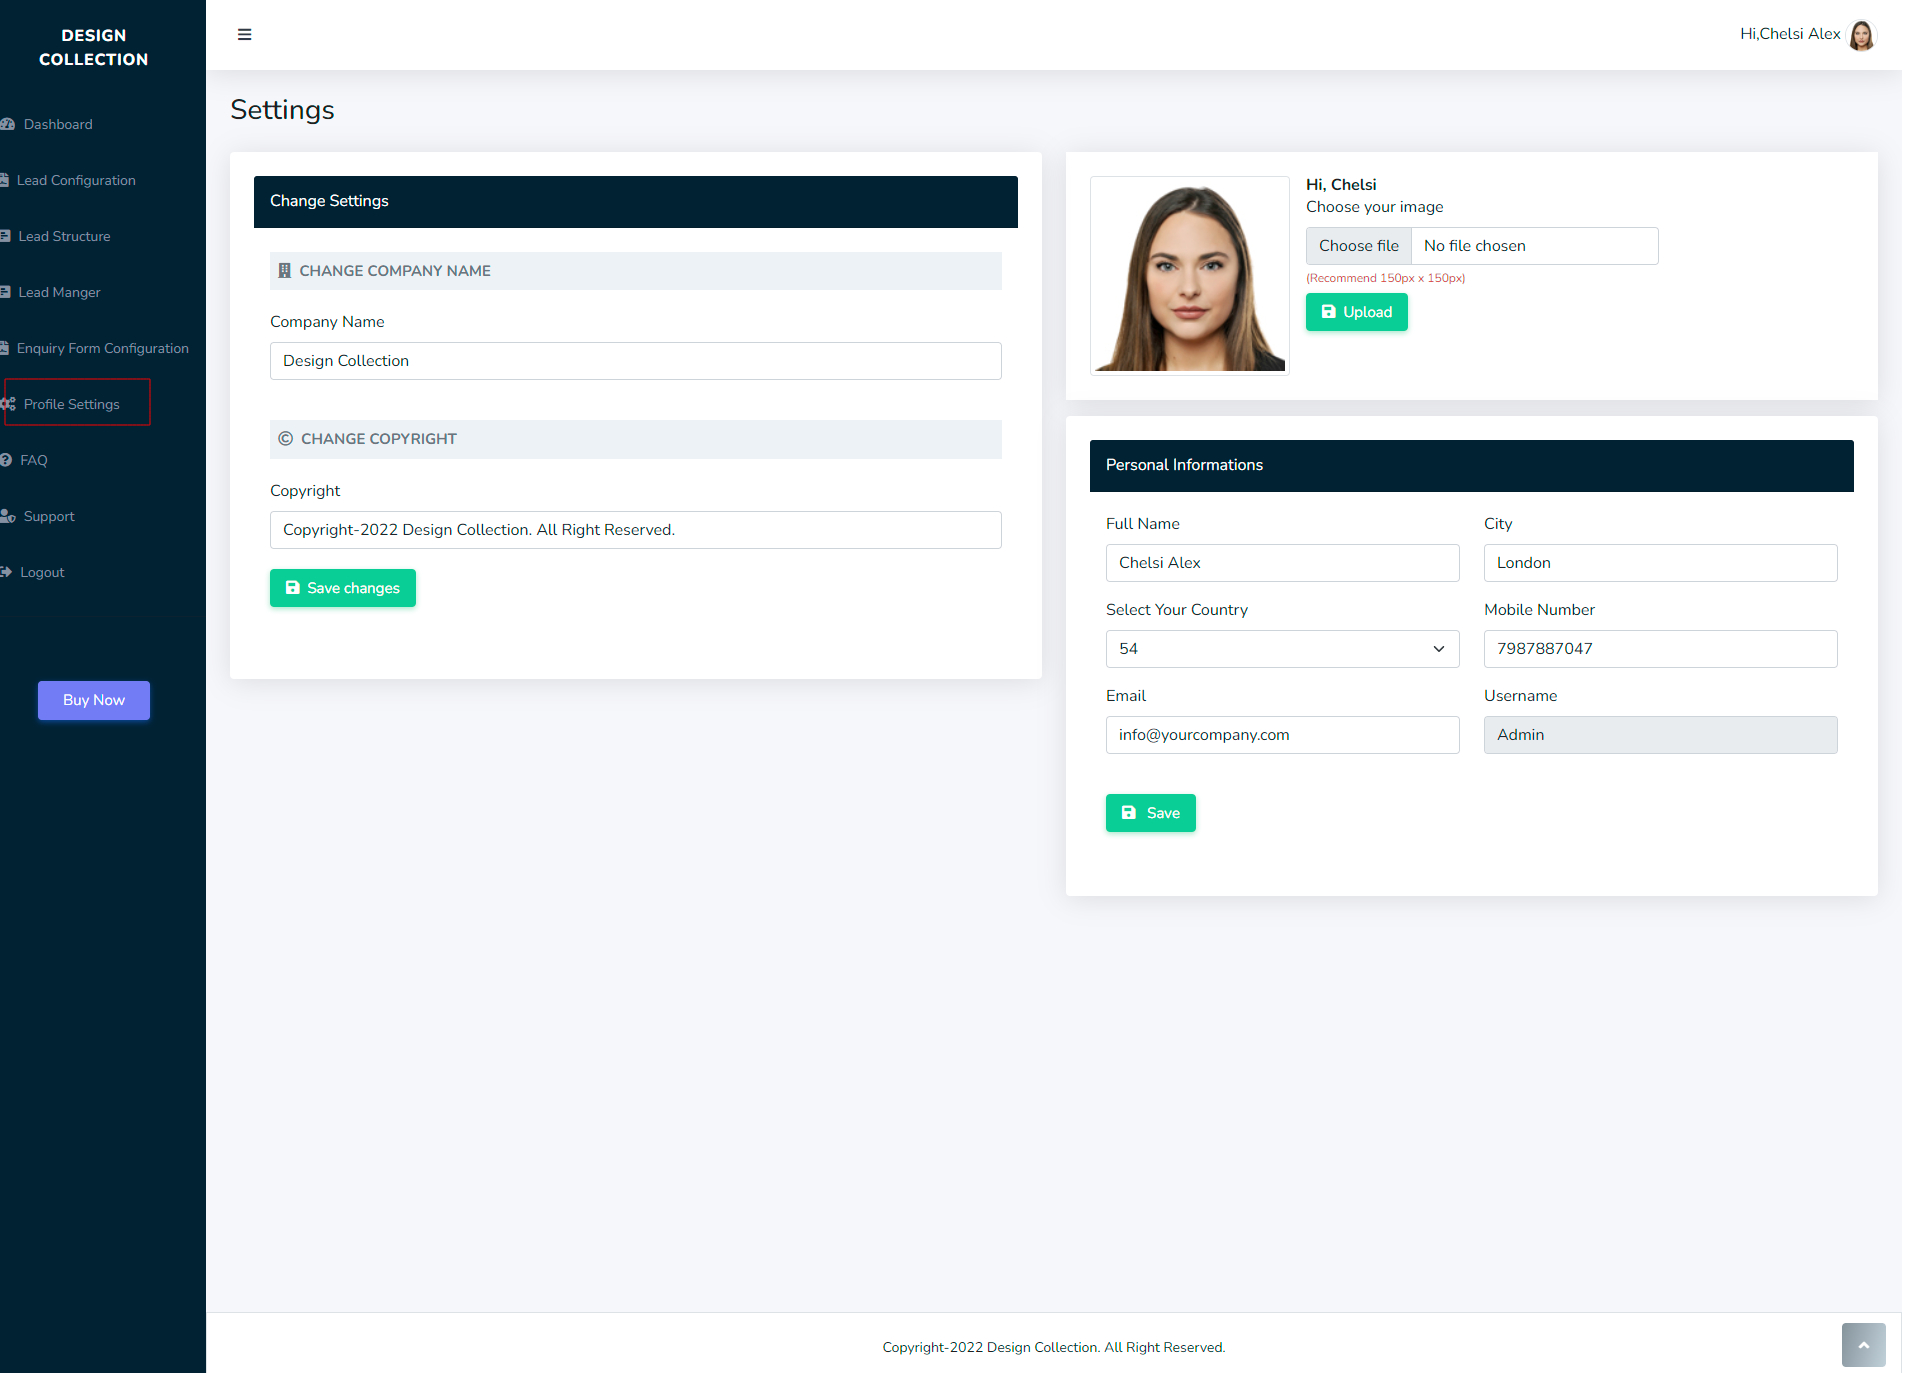
Finally, access the Profile Settings section to update your company name, copyright information, personal details, and images. Regularly reviewing these details ensures that your profile remains up-to-date and reflects accurate information. Visit our Profile Settings Guide for detailed instructions.
